Workflow basics
Workflows let your team orchestrate extra actions before an email is sent — adding a delay, swapping the template, and more — without changing your code.
Build your first workflow
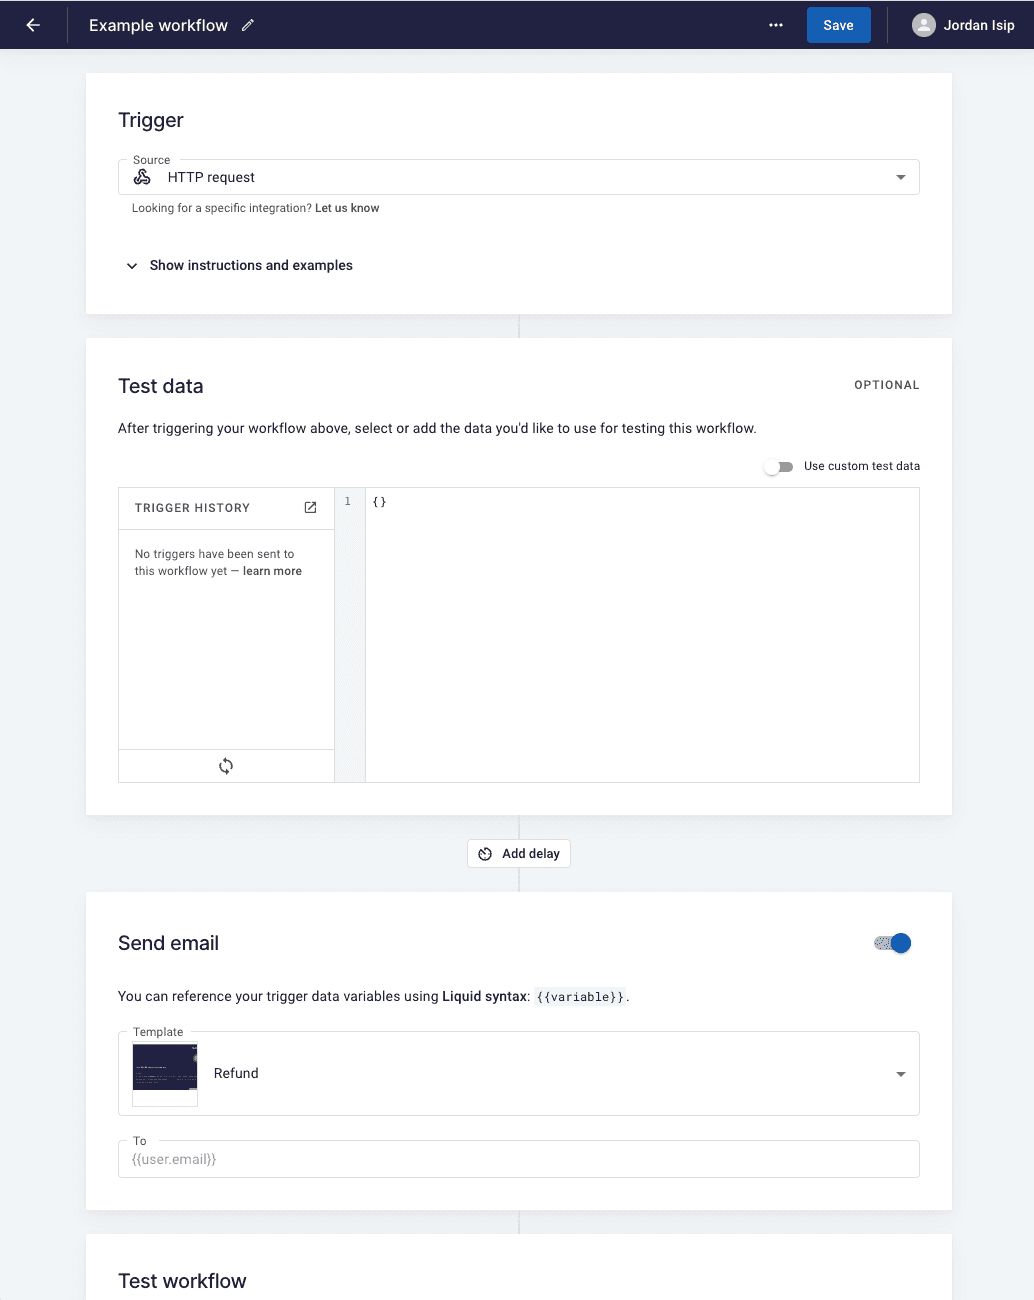
Section titled “Build your first workflow”- In your workspace, go to ‘Workflows’ and click ’+ New’.
- In the ‘Test data’ section, switch on ‘Use custom test data’.
- Stub out the data this workflow should receive — usually the same data your template is expecting.
- Configure the rest of the workflow — set an optional delay and pick a template.
- Click ‘Run workflow with test data’ to test.
Trigger the workflow
Section titled “Trigger the workflow”Once you’re happy with the workflow, grab the code example at the top of the page and trigger it from your application.