Trigger workflows via webhooks
If a third-party service can send webhooks for its events, you can create a webhook endpoint URL on Waypoint to listen for them and trigger a workflow (and the resulting email).
Common examples:
- A successful payment on Stripe.
- A new pull request on GitHub.
- A new user account on Auth0.
- A new order on Shopify.
- A shipping status change on Shippo.
Once the endpoint is set up, Waypoint listens for the events you configured. When one arrives, it triggers your workflow — processing the webhook data and sending the associated email.
Trigger: HTTP POST
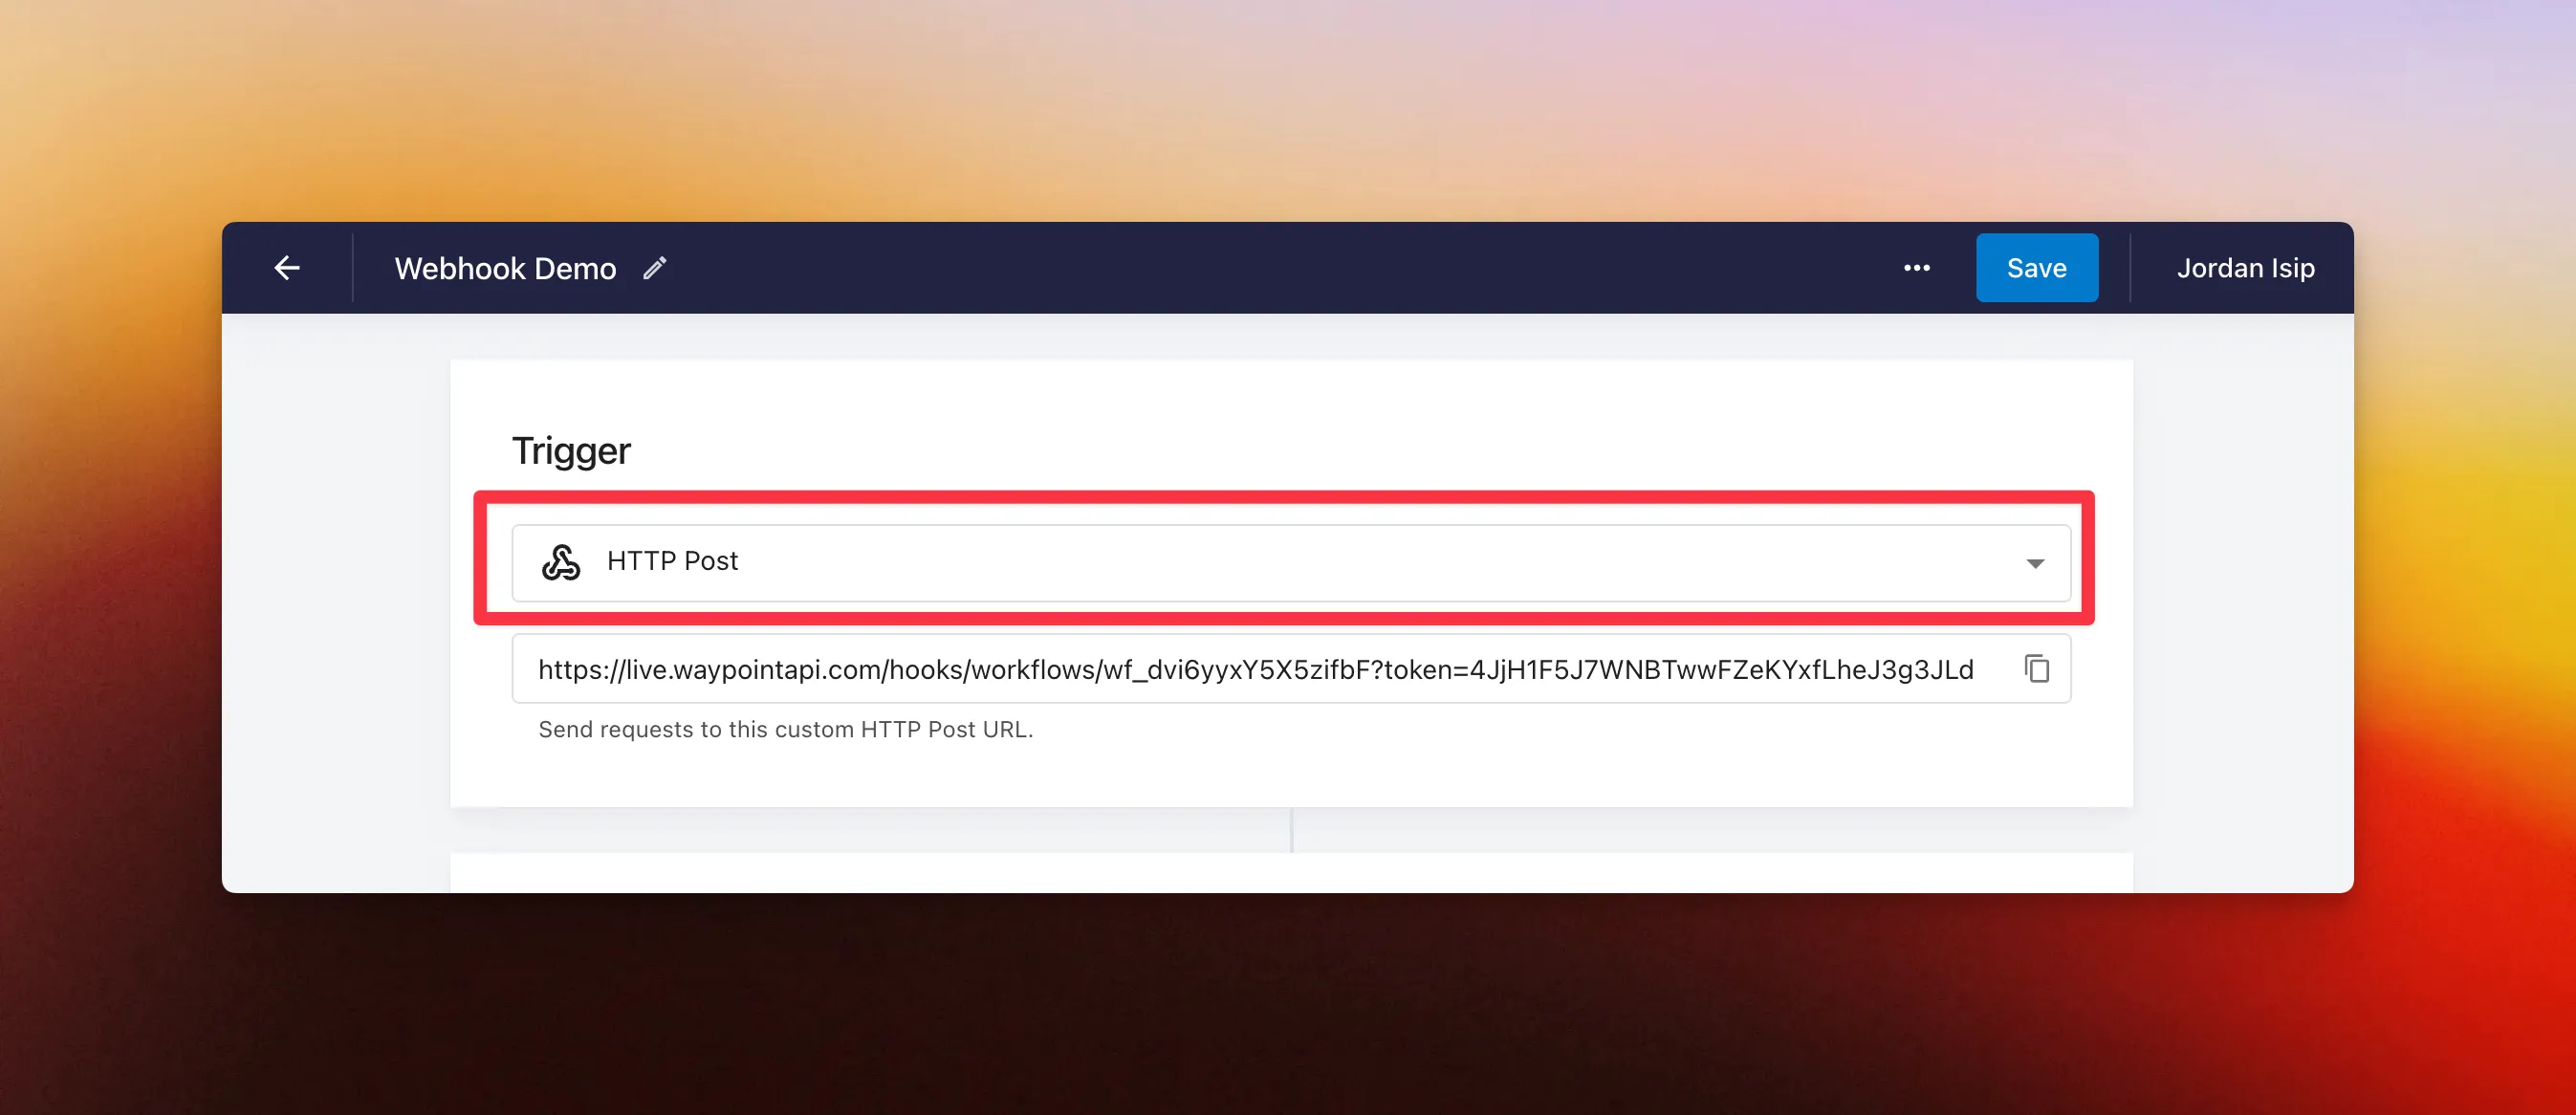
Section titled “Trigger: HTTP POST”To trigger a workflow from a webhook, set the workflow’s trigger type to HTTP POST. You’ll get an endpoint URL that listens for webhook events from any third-party service.
Example: Stripe webhook event
Section titled “Example: Stripe webhook event”Step 1: Set up the workflow trigger
Section titled “Step 1: Set up the workflow trigger”Create a new workflow and set the trigger type to HTTP POST.
Step 2: Copy the webhook endpoint URL
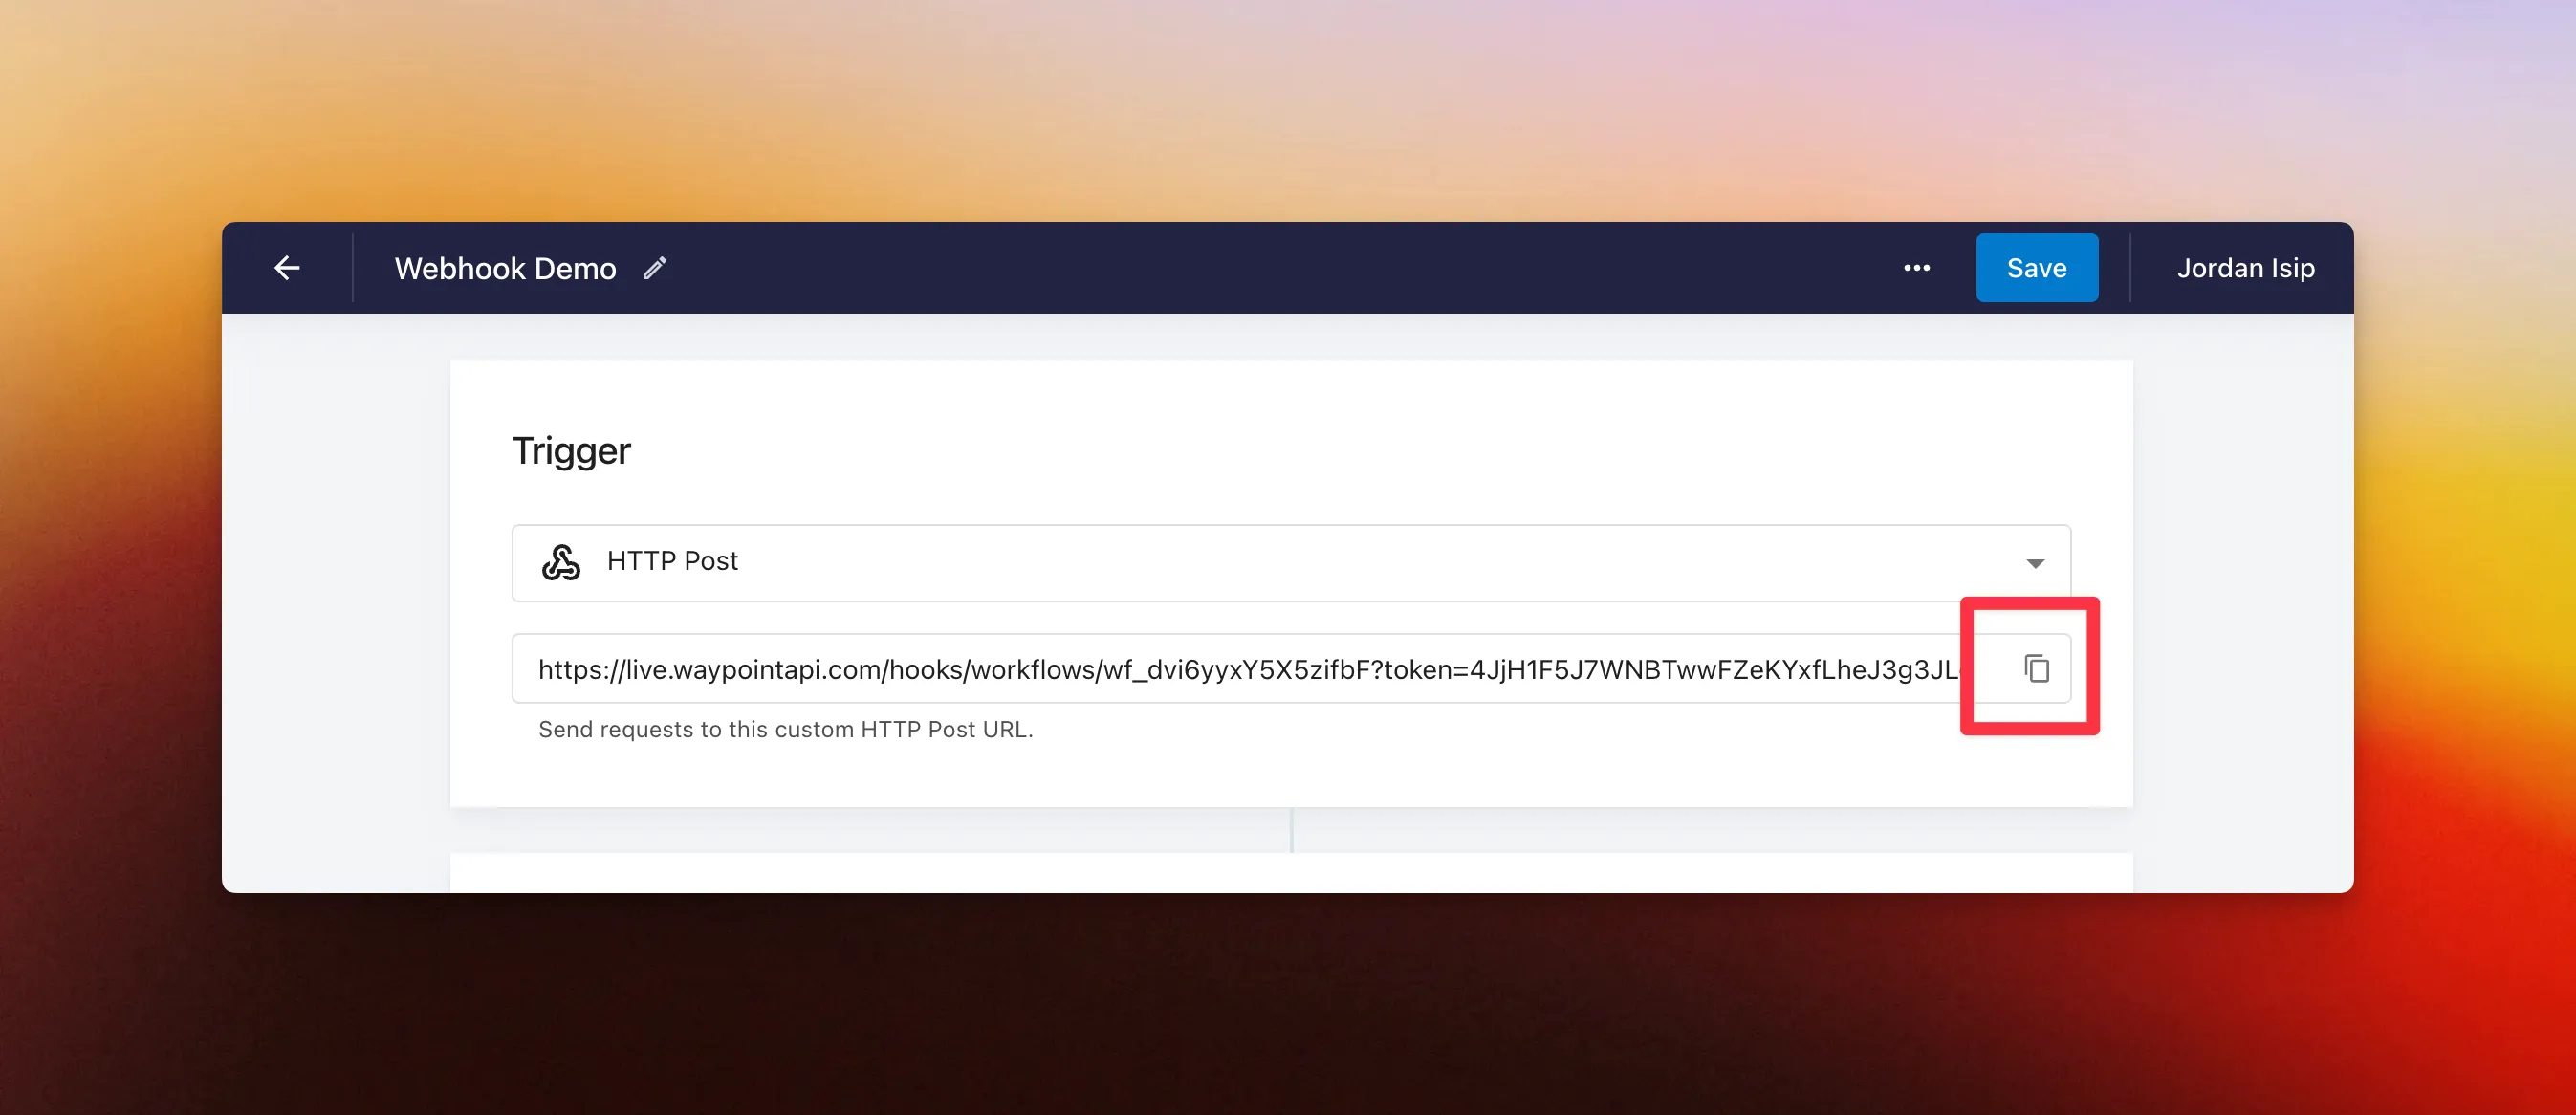
Section titled “Step 2: Copy the webhook endpoint URL”Copy the workflow’s webhook endpoint URL to your clipboard.
Step 3: Create a webhook on Stripe
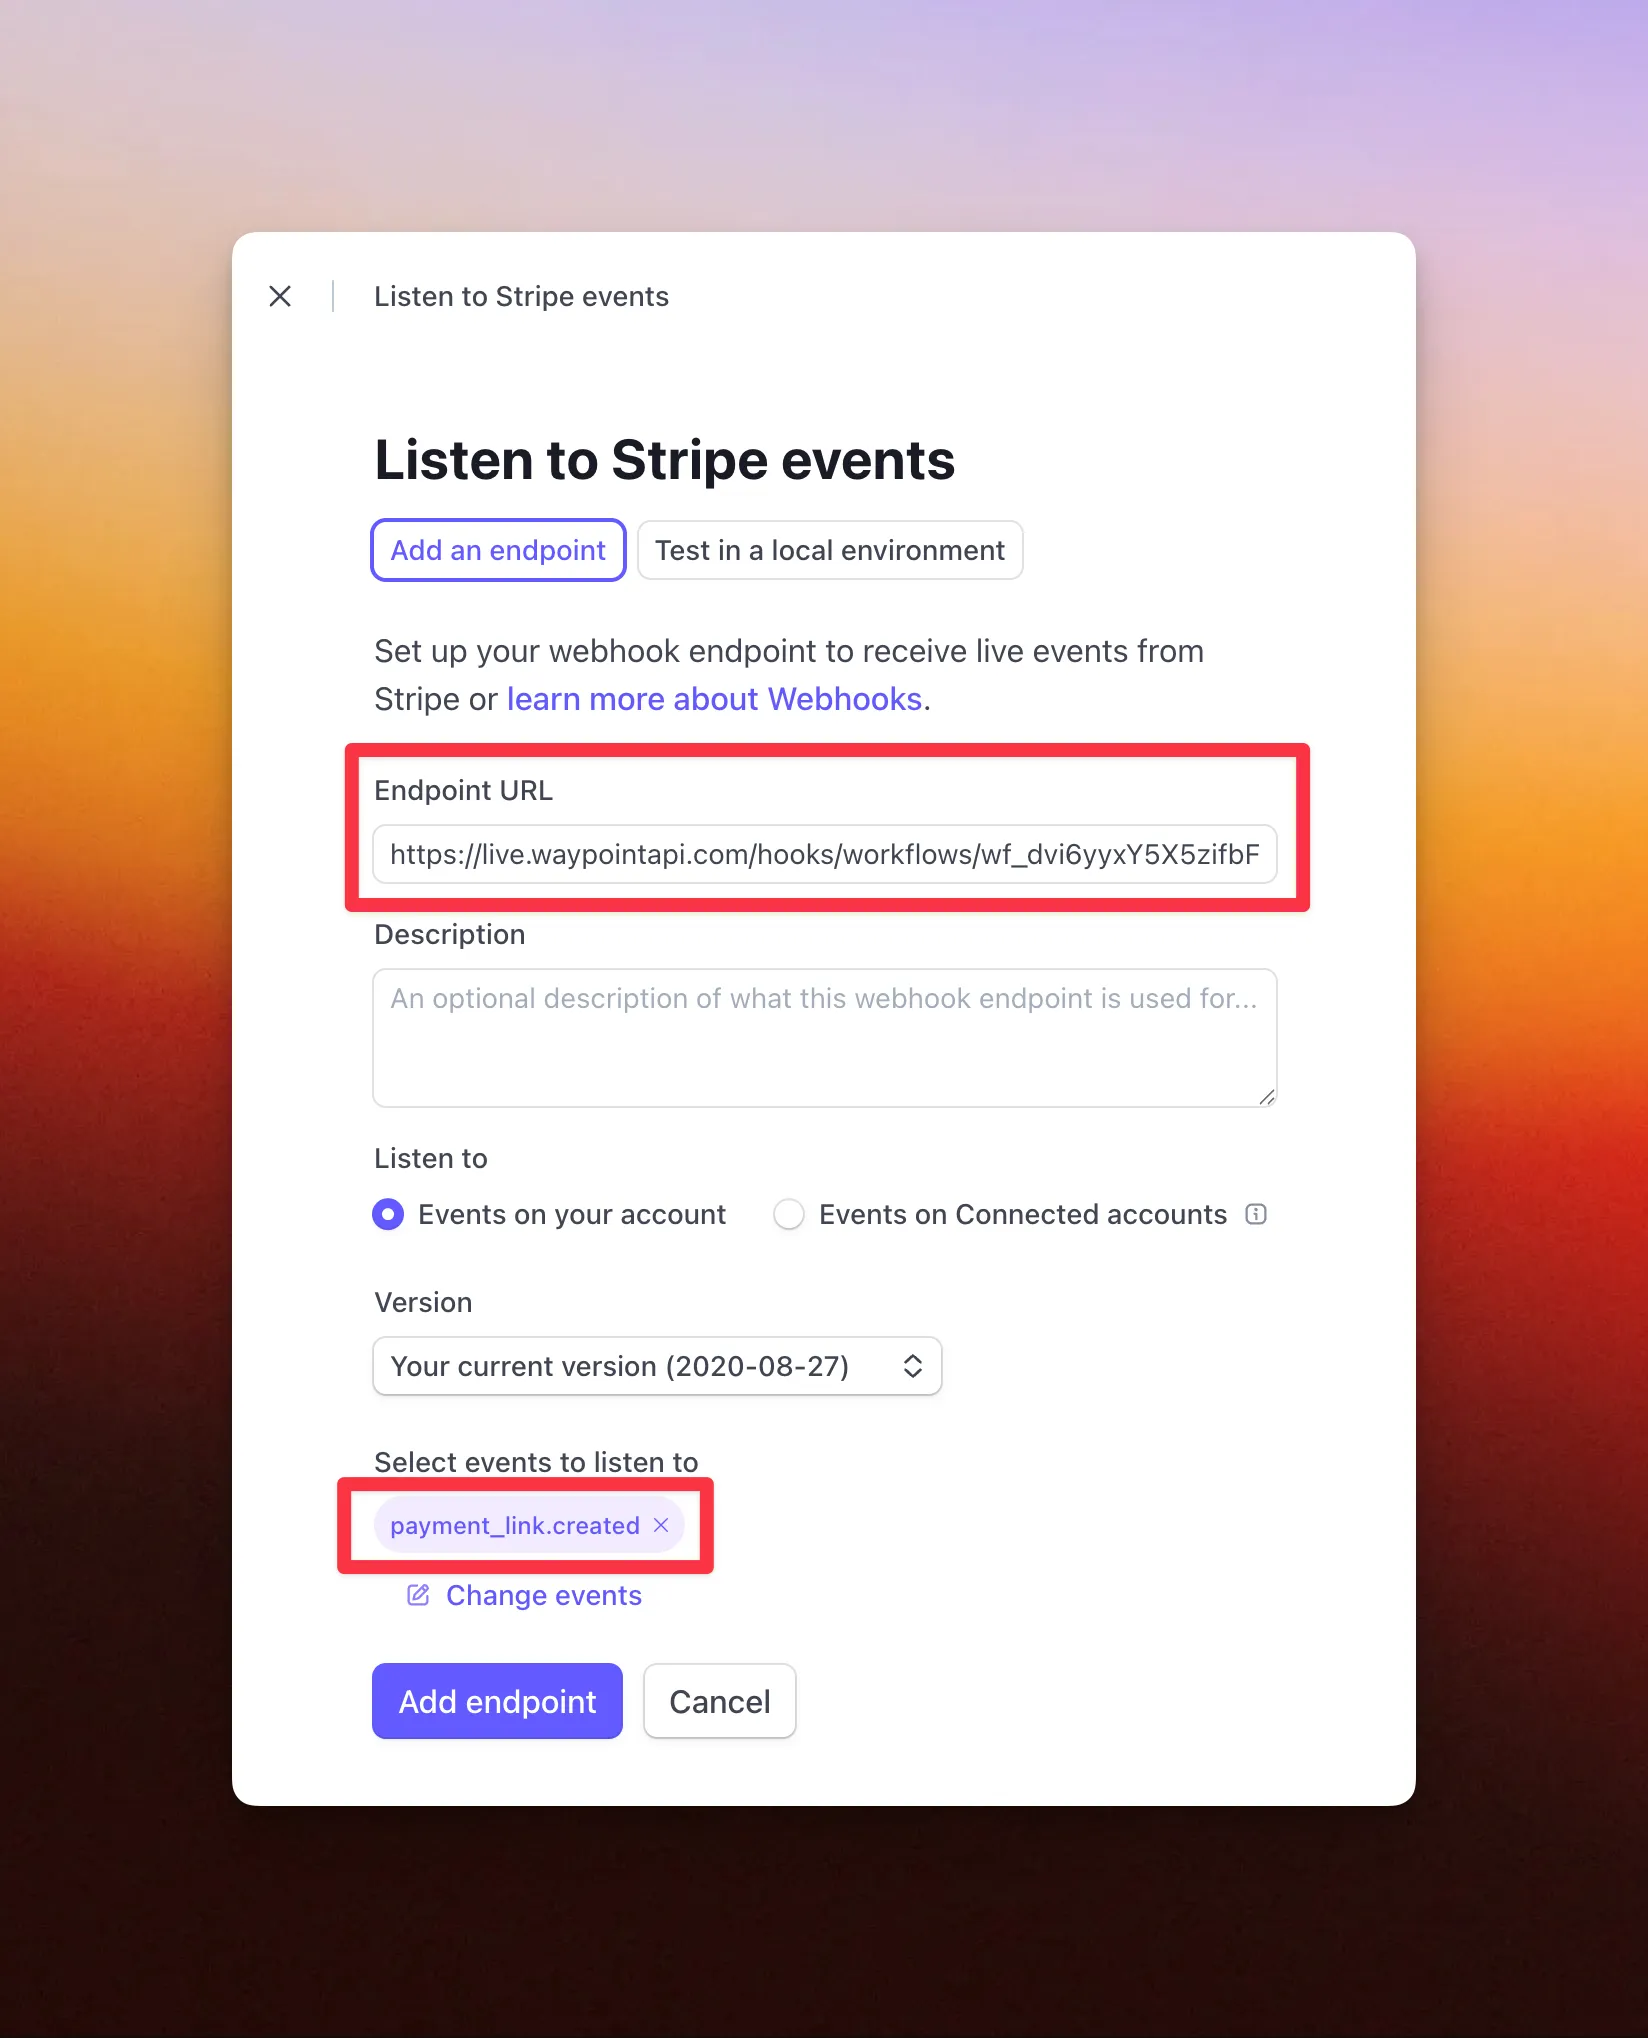
Section titled “Step 3: Create a webhook on Stripe”In the Stripe Dashboard, head to Developers → Webhooks to create a new webhook.
- Paste your workflow endpoint URL into the Endpoint URL field.
- Under ‘Select events to listen to’, pick the event types that should trigger the workflow. For this example, we’ll use
payment_link.createdso every new Payment Link fires a webhook. - Click ‘Add endpoint’ to save.
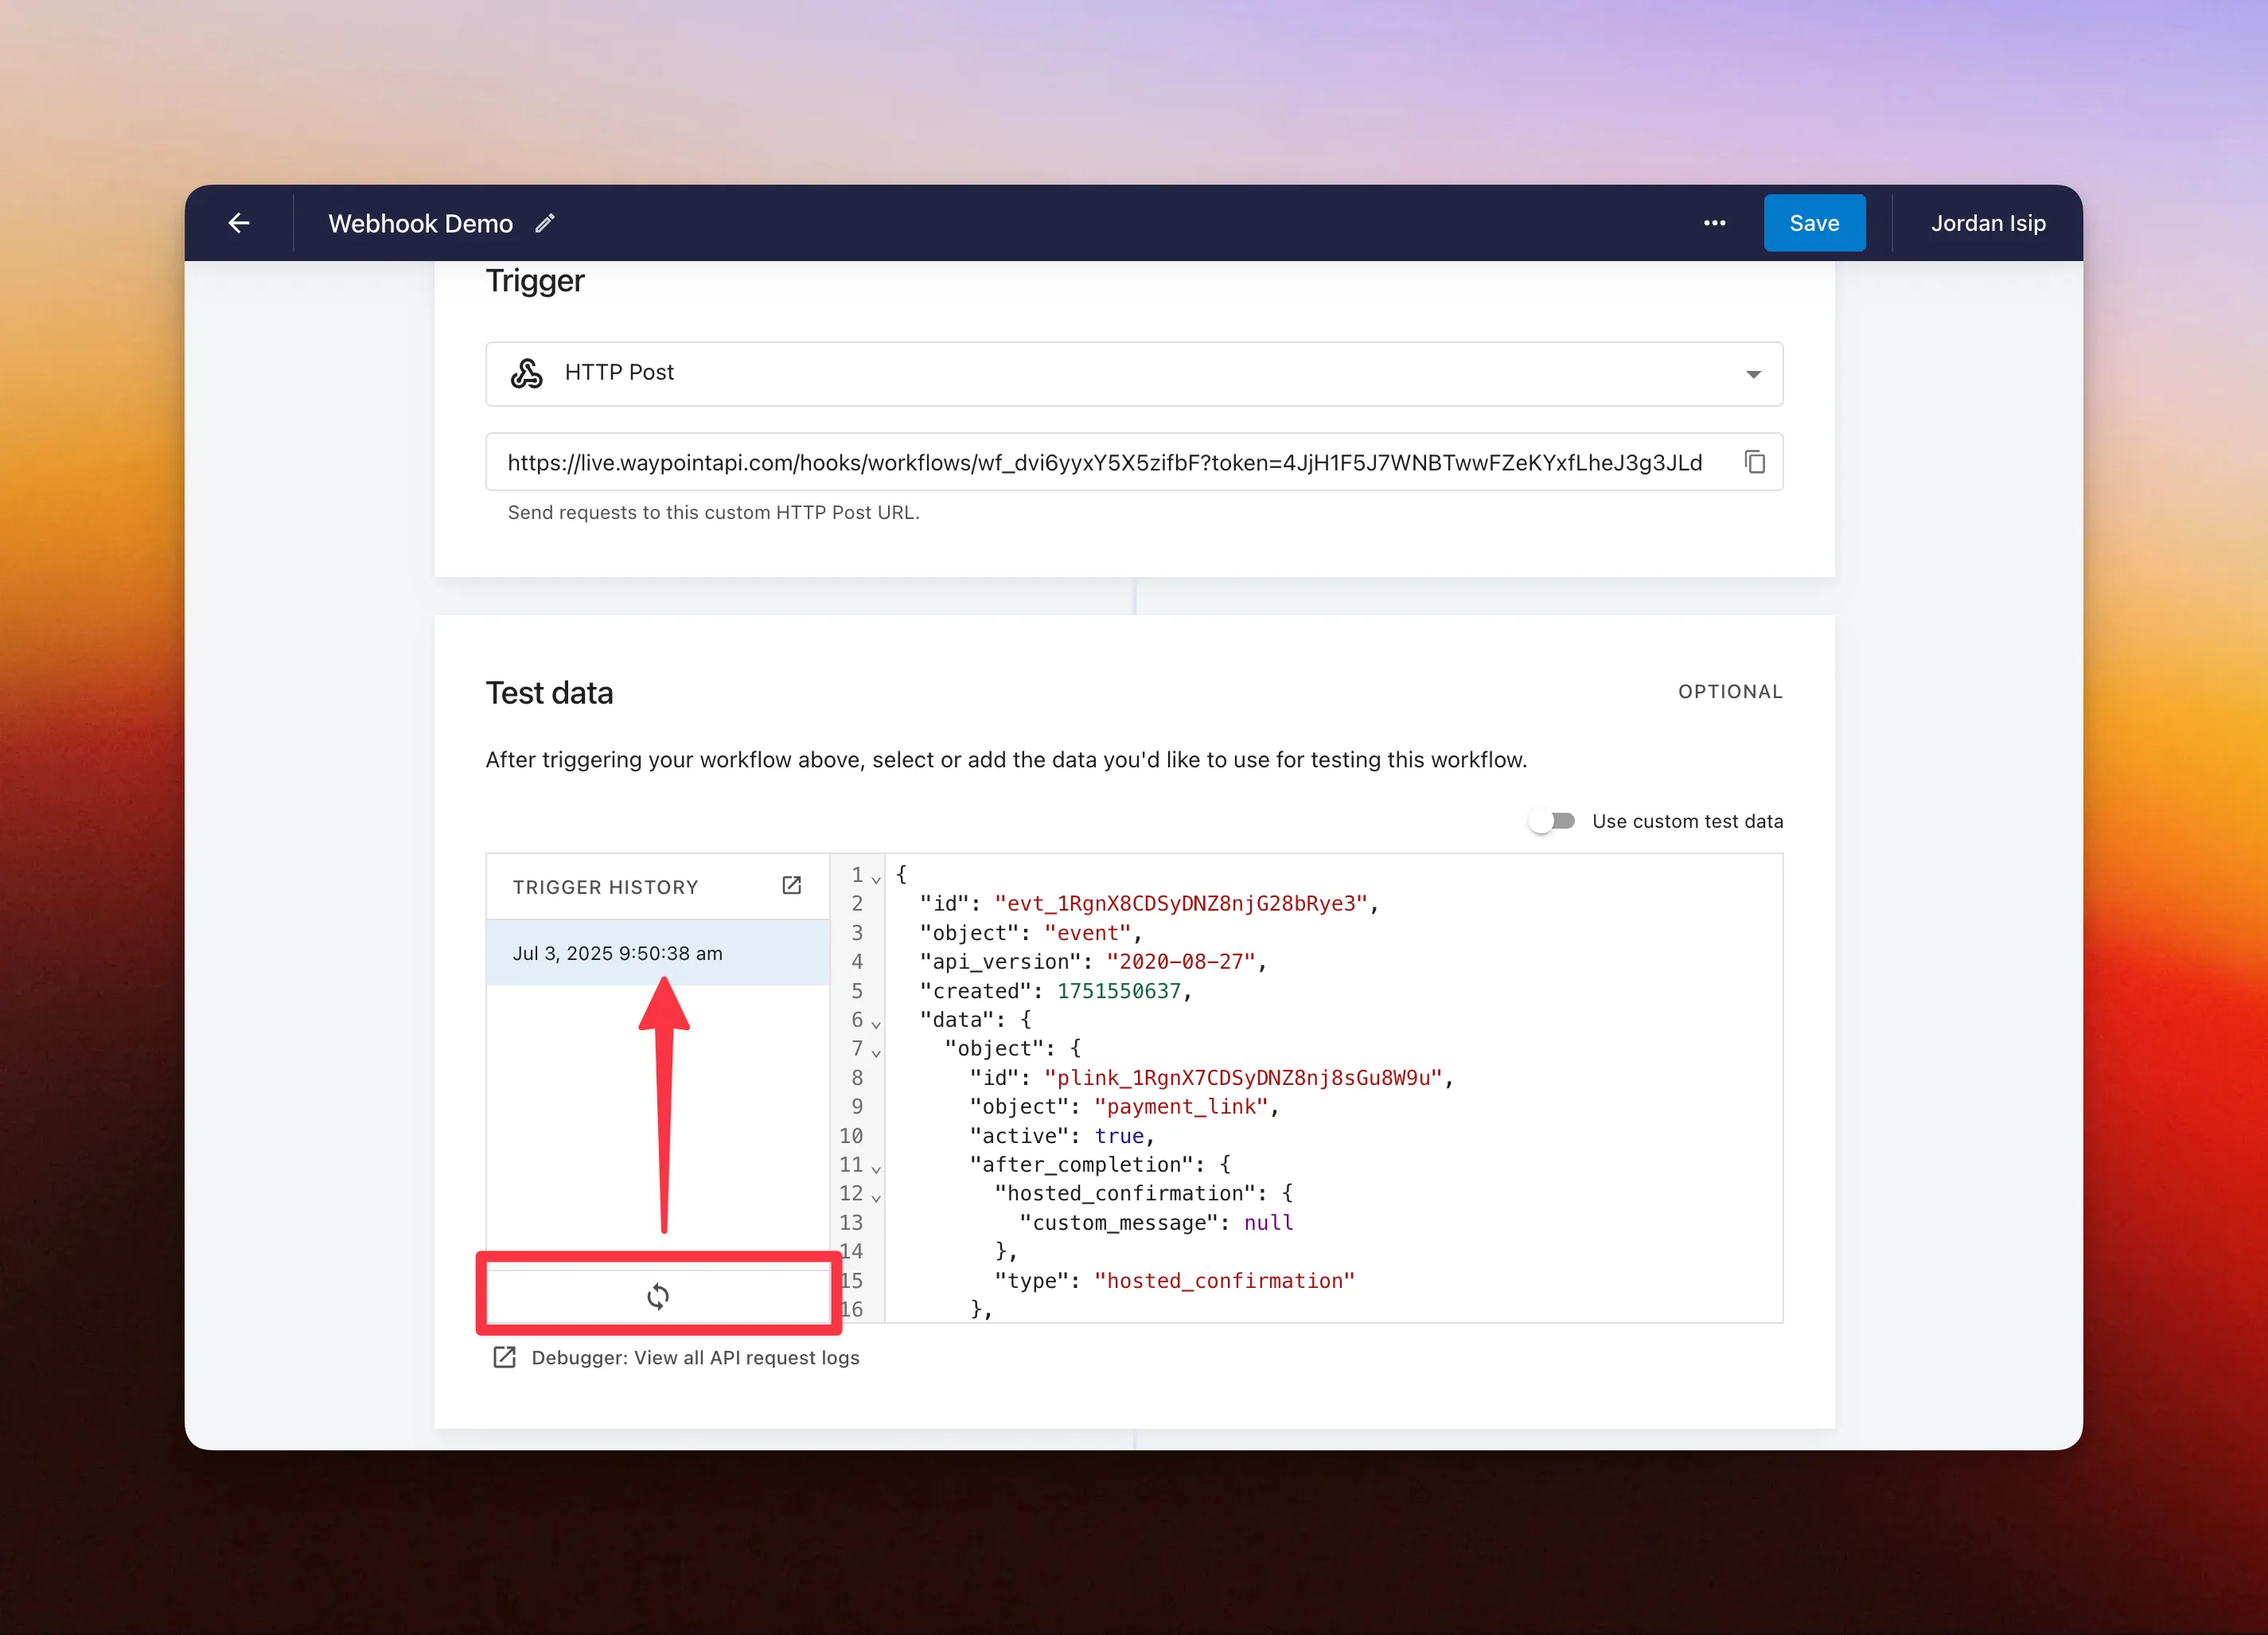
Step 4: Test the webhook connection
Section titled “Step 4: Test the webhook connection”Now that Stripe is wired up, run a quick check that data is flowing through.
- Since the trigger is set to new Payment Links, start by creating a Payment Link on Stripe.
- Stripe sends a webhook event to your workflow endpoint URL in the background.
- Back in your Waypoint workflow, scroll to the ‘Test data’ section and click the Refresh icon. You should see the incoming event and its payload:
Step 5: Configure the email template
Section titled “Step 5: Configure the email template”Use the test data to set up the email template. Pick an existing template or use a quick template.
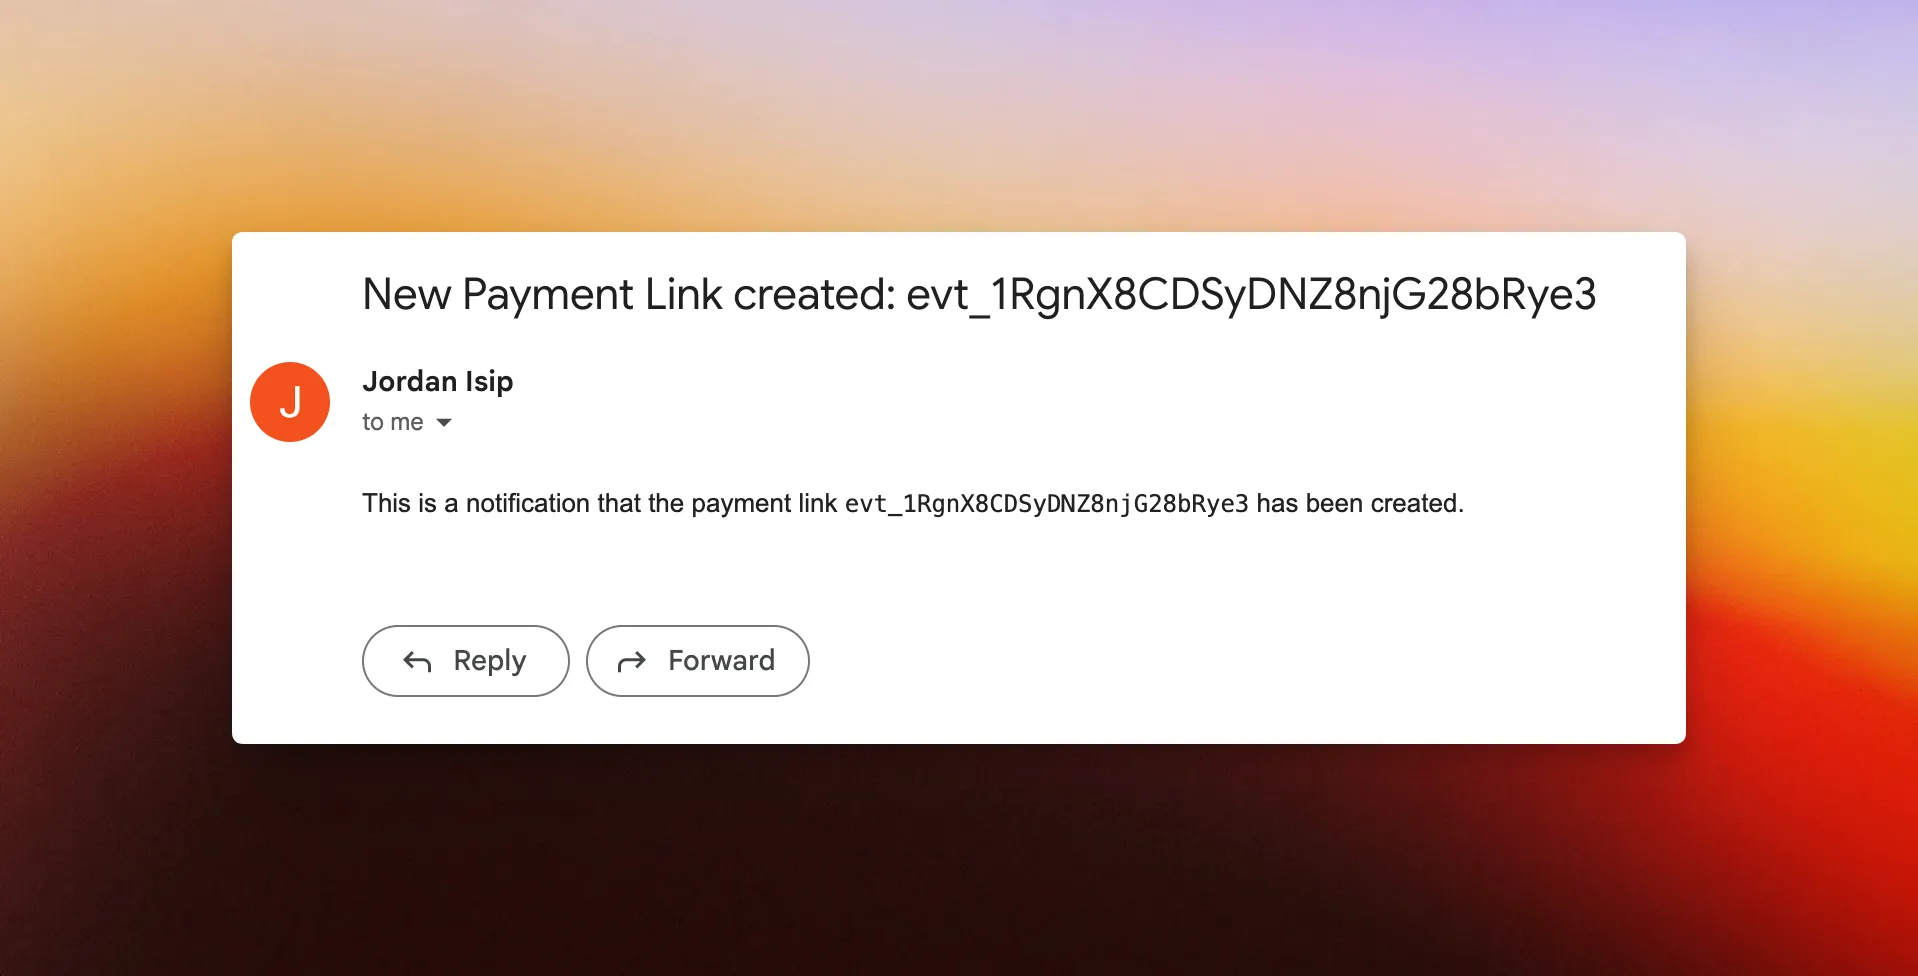
For this example, we’ll use a quick template and reference the webhook’s id in both the subject line and body content with the template variable {{id}}.

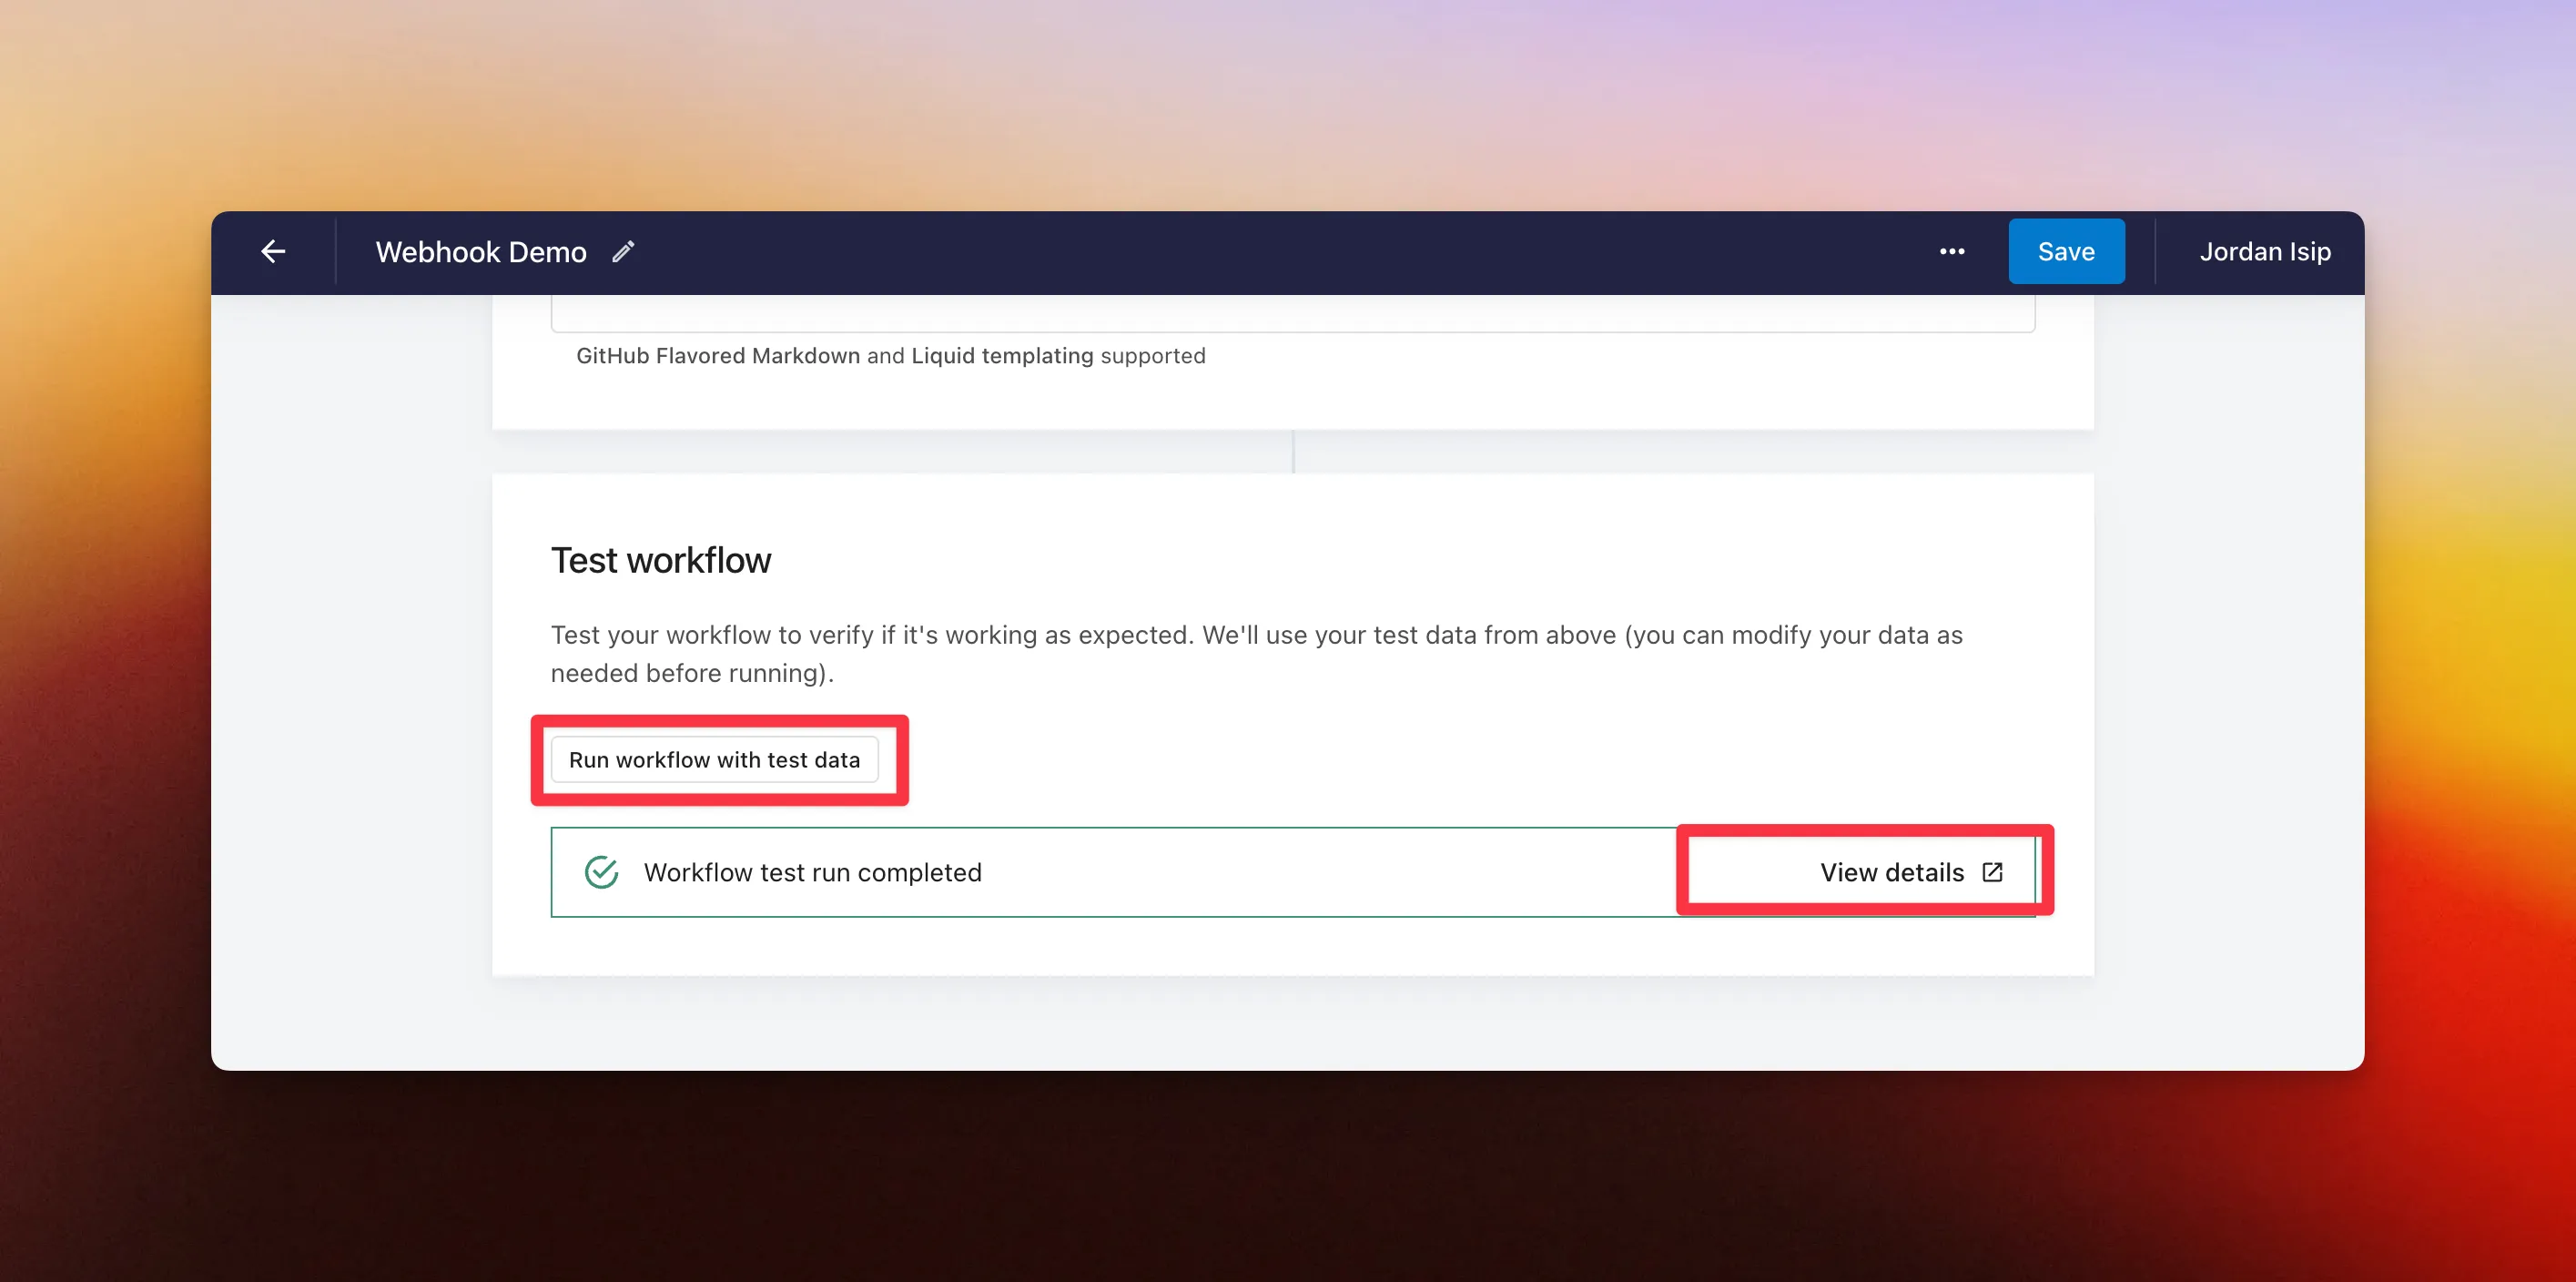
Step 6: Test the workflow
Section titled “Step 6: Test the workflow”Test the workflow end-to-end using the test data from Step 4.
- Click ‘Run workflow with test data’.
- Once it finishes, click ‘View details’.
- Review the end-to-end results.
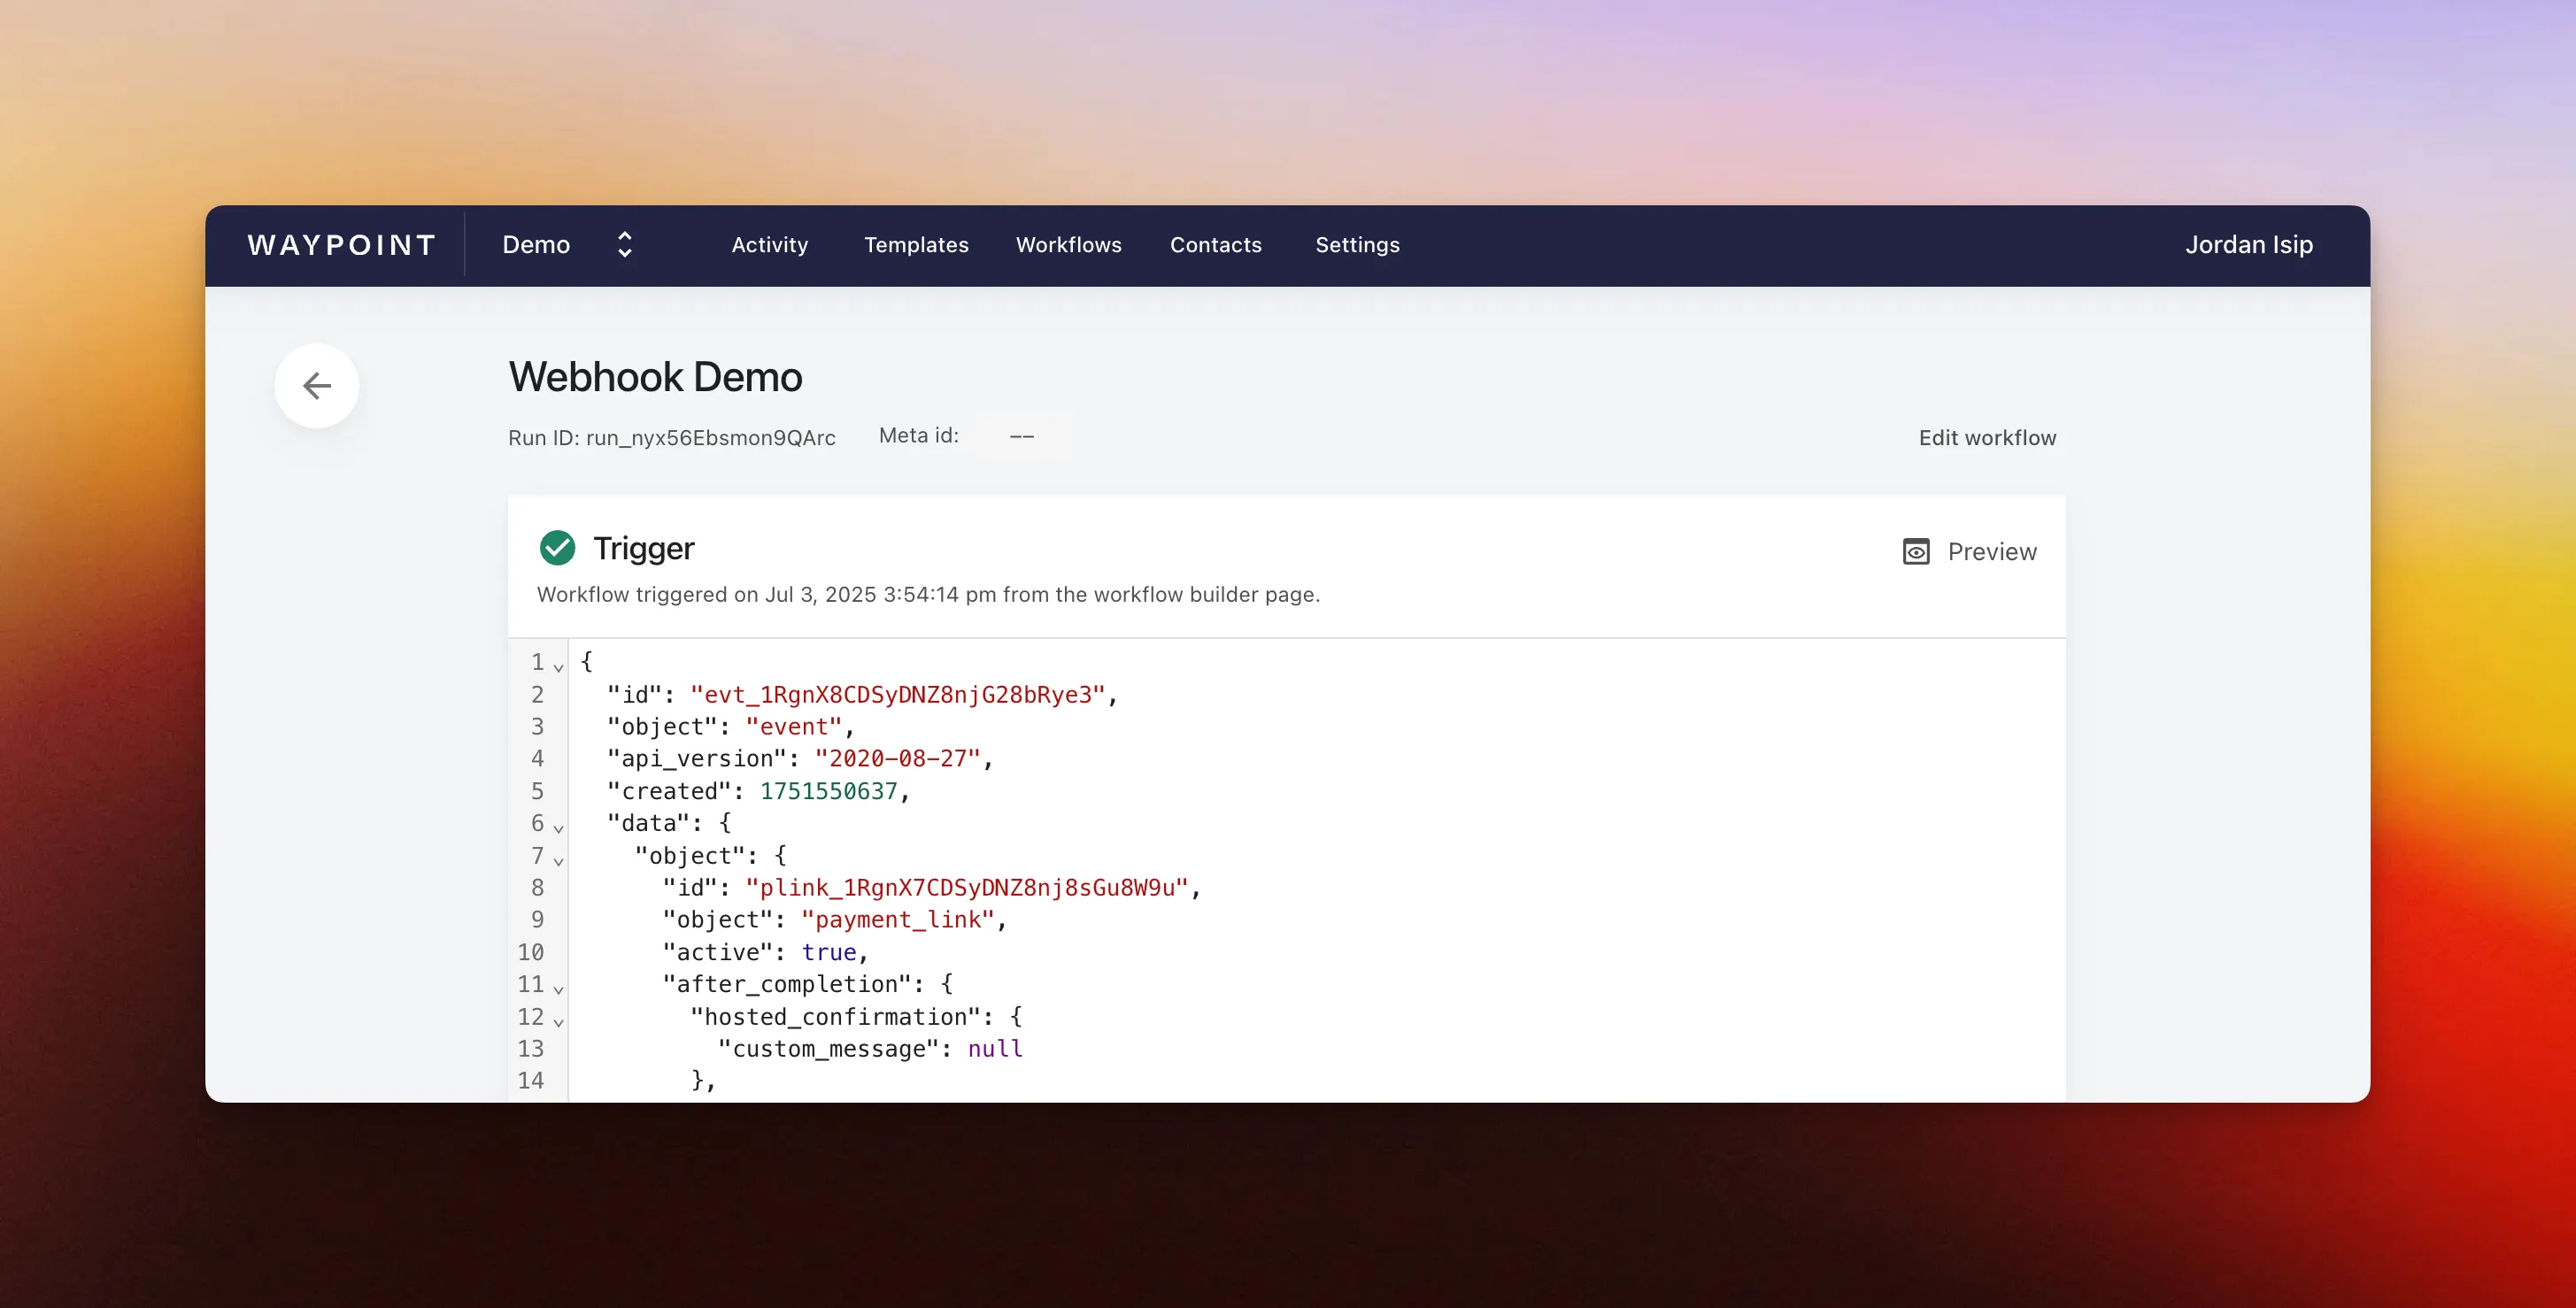
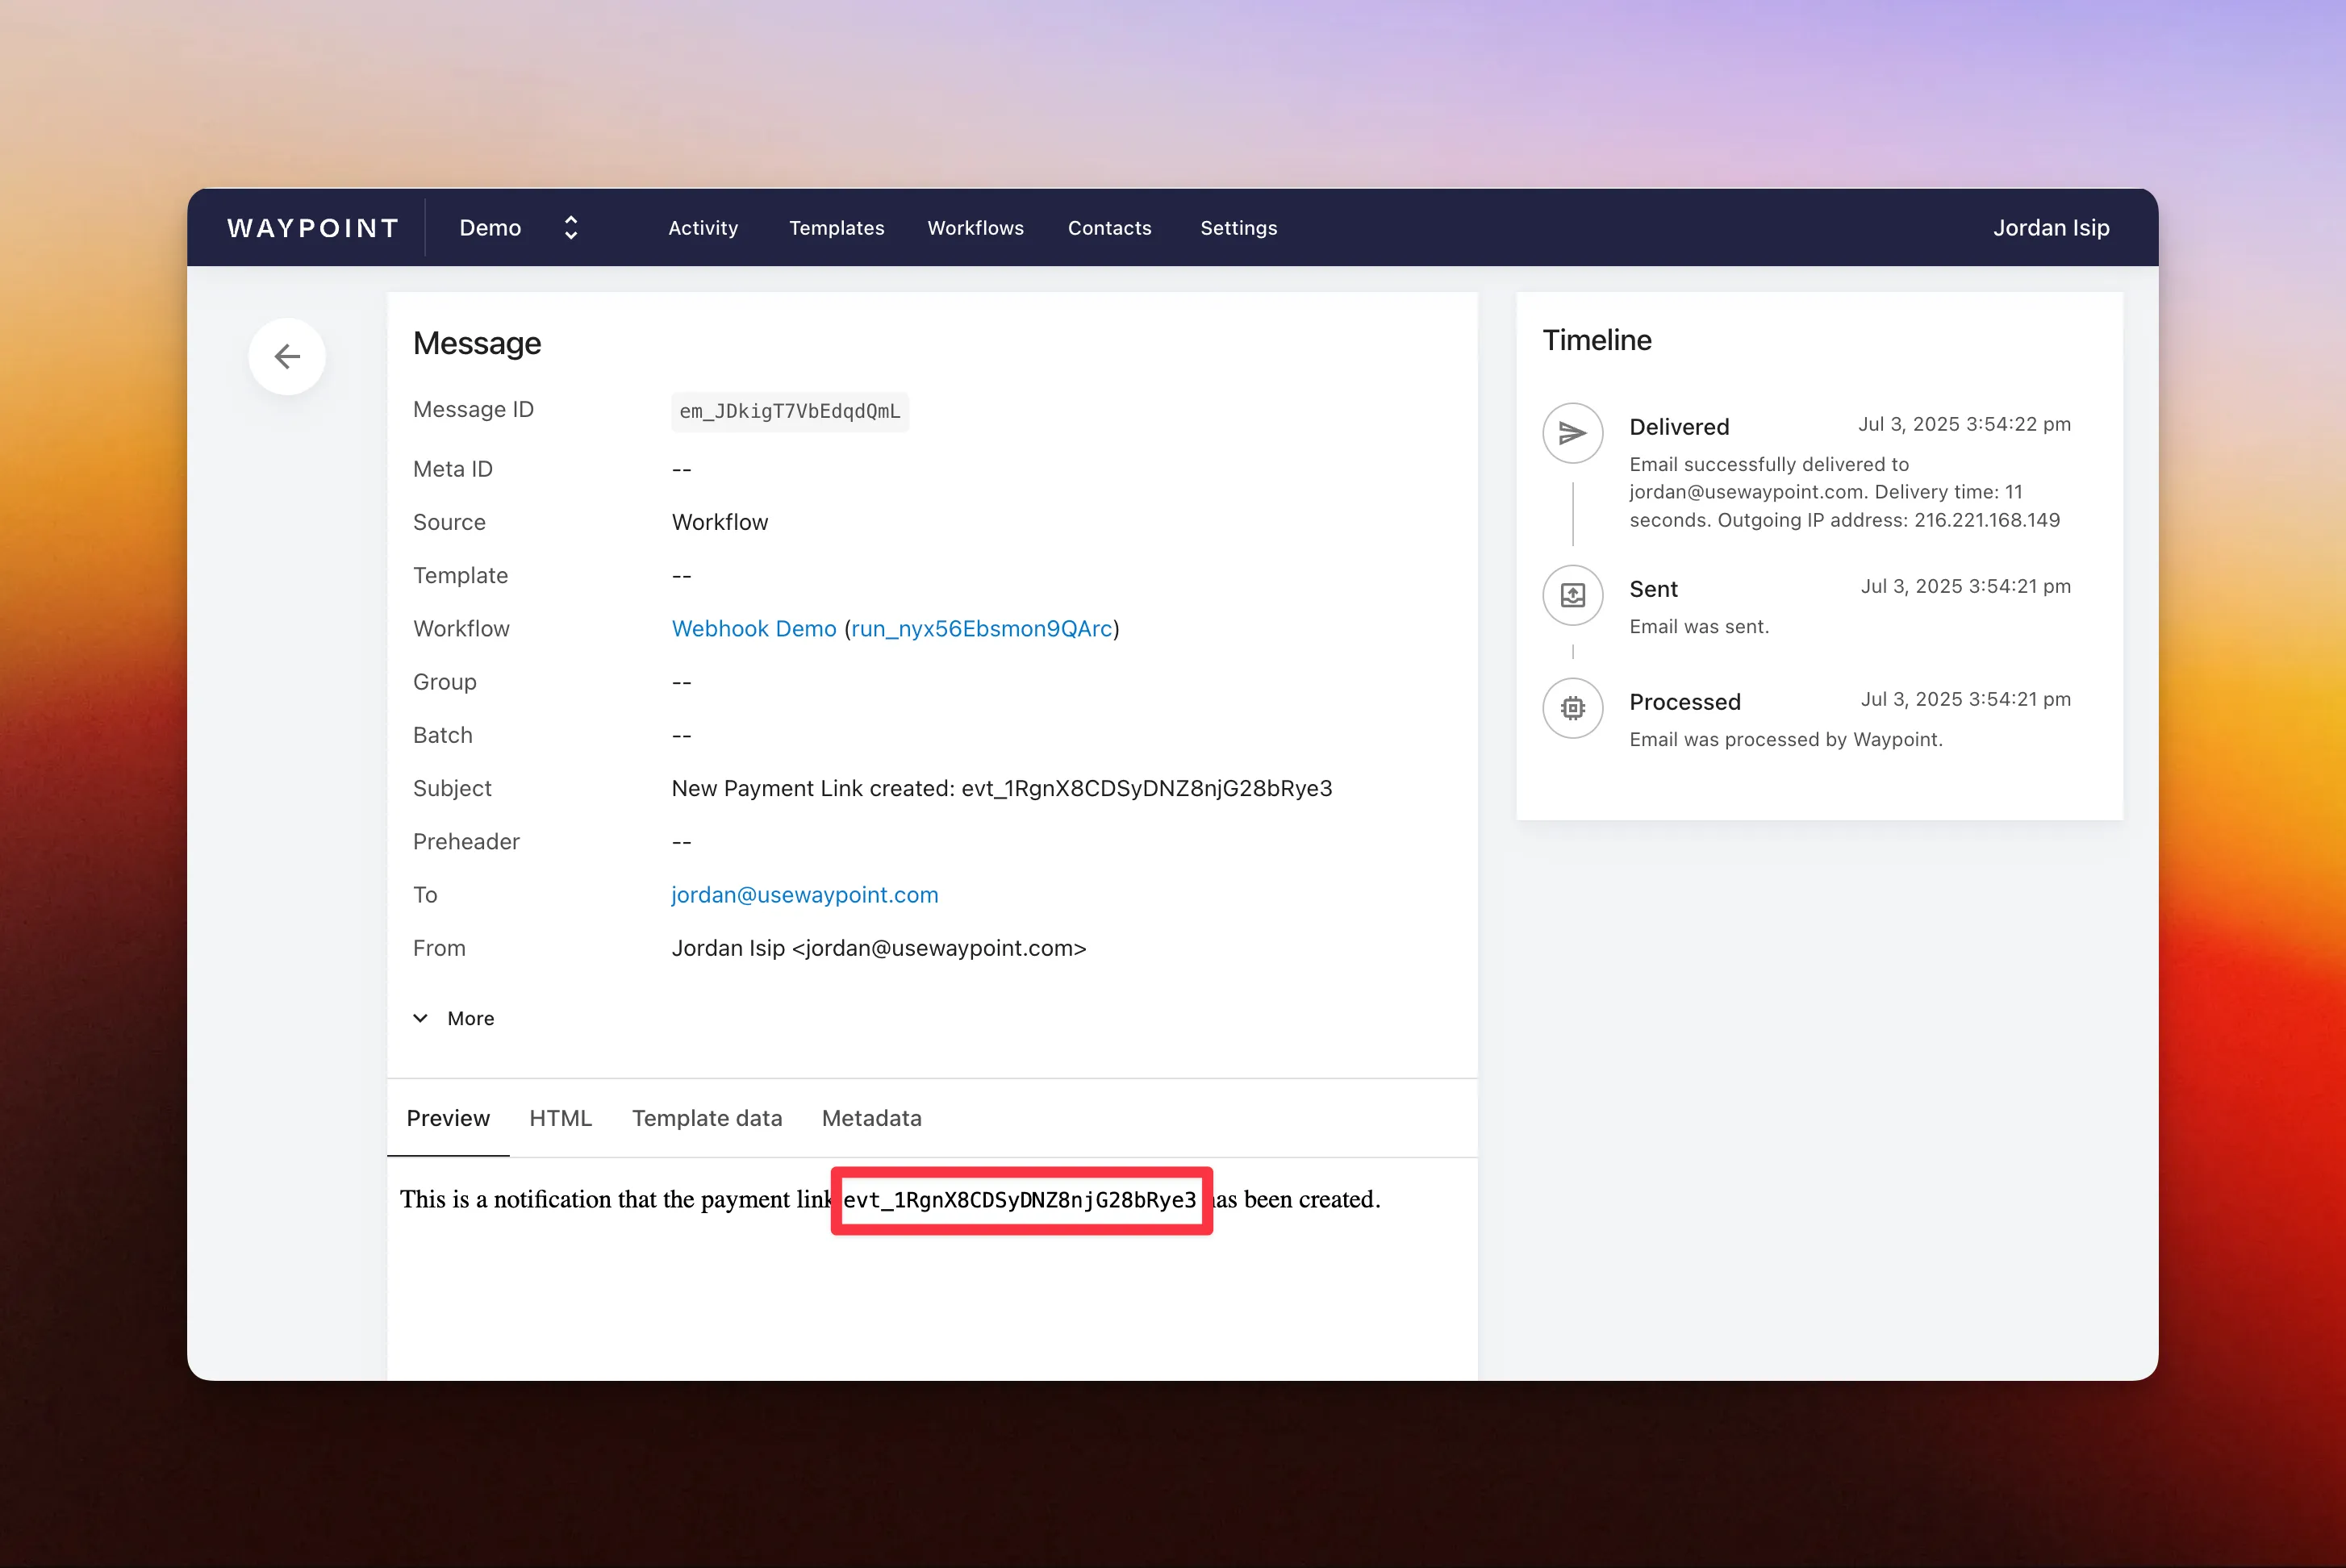
Step 7: View the test message
Section titled “Step 7: View the test message”From your workflow run, click the message to open the full log. You’ll see the {{id}} variable from Step 5 replaced with the actual id from the webhook payload.
Step 8: Save and wait for live runs
Section titled “Step 8: Save and wait for live runs”Head back to your workflow and save it.
From here on, every time Stripe sends an event, your workflow runs, the data flows through your template, and the resulting email goes out automatically.