Unsubscribe groups
Unsubscribe groups let you add an unsubscribe link to a related set of emails. When a contact unsubscribes, they won’t receive any more emails tied to that group.
To add the link, create an unsubscribe group and reference it when sending a templated email API using the groupId or groupKey property.
Waypoint handles the unsubscribe page and the opt-outs, so you can give users the option to unsubscribe from a set of emails with a single line of code.
Tutorial
Section titled “Tutorial”Say we’re sending a series of onboarding emails and want users to be able to unsubscribe from that group.
Step 1: Create an unsubscribe group
Section titled “Step 1: Create an unsubscribe group”In your workspace, go to ‘Contacts’ and click ‘Unsubscribe groups’.

On the Unsubscribe groups page, click ‘New’.
The form has three fields:
- Group name – shown publicly on the unsubscribe page (see Step 3).
- Custom ID key – an optional descriptive key you can pass on API calls instead of the generated ID (see Step 2).
- Unsubscribe section content – the content appended to your template, where the special
unsubscribeUrlvariable lives. Formatted in Markdown.
We’ll name ours ‘Onboarding’, give it a custom key of onboarding for the next step, and leave the content as the default.

Step 2: Send an email with an unsubscribe group
Section titled “Step 2: Send an email with an unsubscribe group”Now we can reference the group from our API call when sending a templated email API.
Since we set a custom key, we’ll use groupKey. Without one, you’d use groupId instead.
const authHeader =  'Basic ' + Buffer.from(`${API_KEY_USERNAME}:${API_KEY_PASSWORD}`).toString('base64');
const options = {  method: 'POST',  headers: {    'Content-Type': 'application/json',    Authorization: authHeader,  },  body: JSON.stringify({    templateId: 'wptemplate_ABc123XYZ',    groupKey: 'onboarding',    to: 'jordan@usewaypoint.com',    variables: {      displayName: 'Jordan',    },  }),};
fetch('https://live.waypointapi.com/v1/email_messages', options) .then((res) => res.json()) .then((res) => console.log(res)) .catch((err) => console.error(err));Step 3: View the email with the unsubscribe link
Section titled “Step 3: View the email with the unsubscribe link”After a successful send, head back to ‘Activity’ and click the latest message. The email log shows the associated unsubscribe group and the unsubscribe link in the preview.

Step 4: Test the unsubscribe
Section titled “Step 4: Test the unsubscribe”Now let’s confirm the whole flow works.
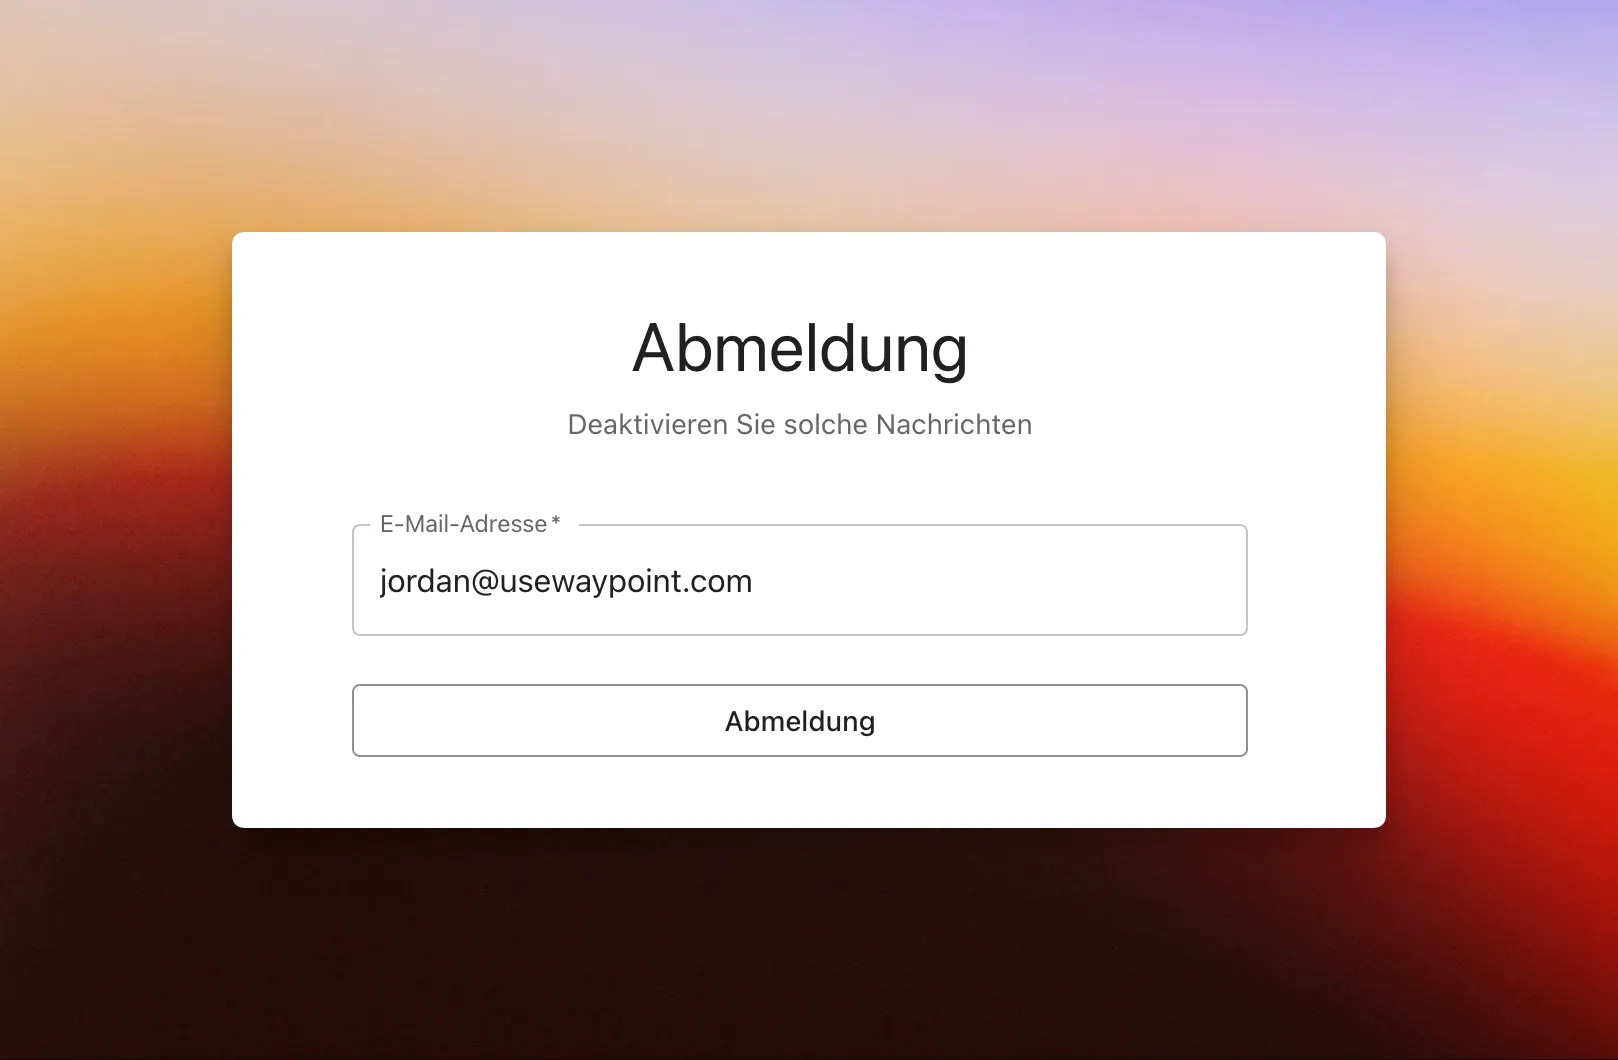
Click the ‘Unsubscribe’ link — either from the email log (Step 3) or the actual email that landed in the inbox — and you’ll see Waypoint’s hosted unsubscribe page.
Notice the group name from Step 1 shows up publicly here: “Opt out of [group name] emails”.

Click ‘Unsubscribe’.

Head back to your unsubscribe group from Step 1 and you’ll find the contact listed there.

And in the email log from Step 3, the unsubscribe event now shows up in the timeline.

Step 5: Test the suppression
Section titled “Step 5: Test the suppression”With the contact unsubscribed, repeat Step 2 — send a different email to the same contact using the same unsubscribe group.
Since they’re unsubscribed, the email is suppressed instead of delivered, but it’s still visible in the logs:

You can also view and filter suppressions and unsubscribes from the ‘Activity’ page:

Step 6: Wrap up
Section titled “Step 6: Wrap up”The group is set up and the unsubscribe link works end-to-end. To clean up the test contact, head back to Unsubscribe Groups and click the ’-’ next to their name.

Customization
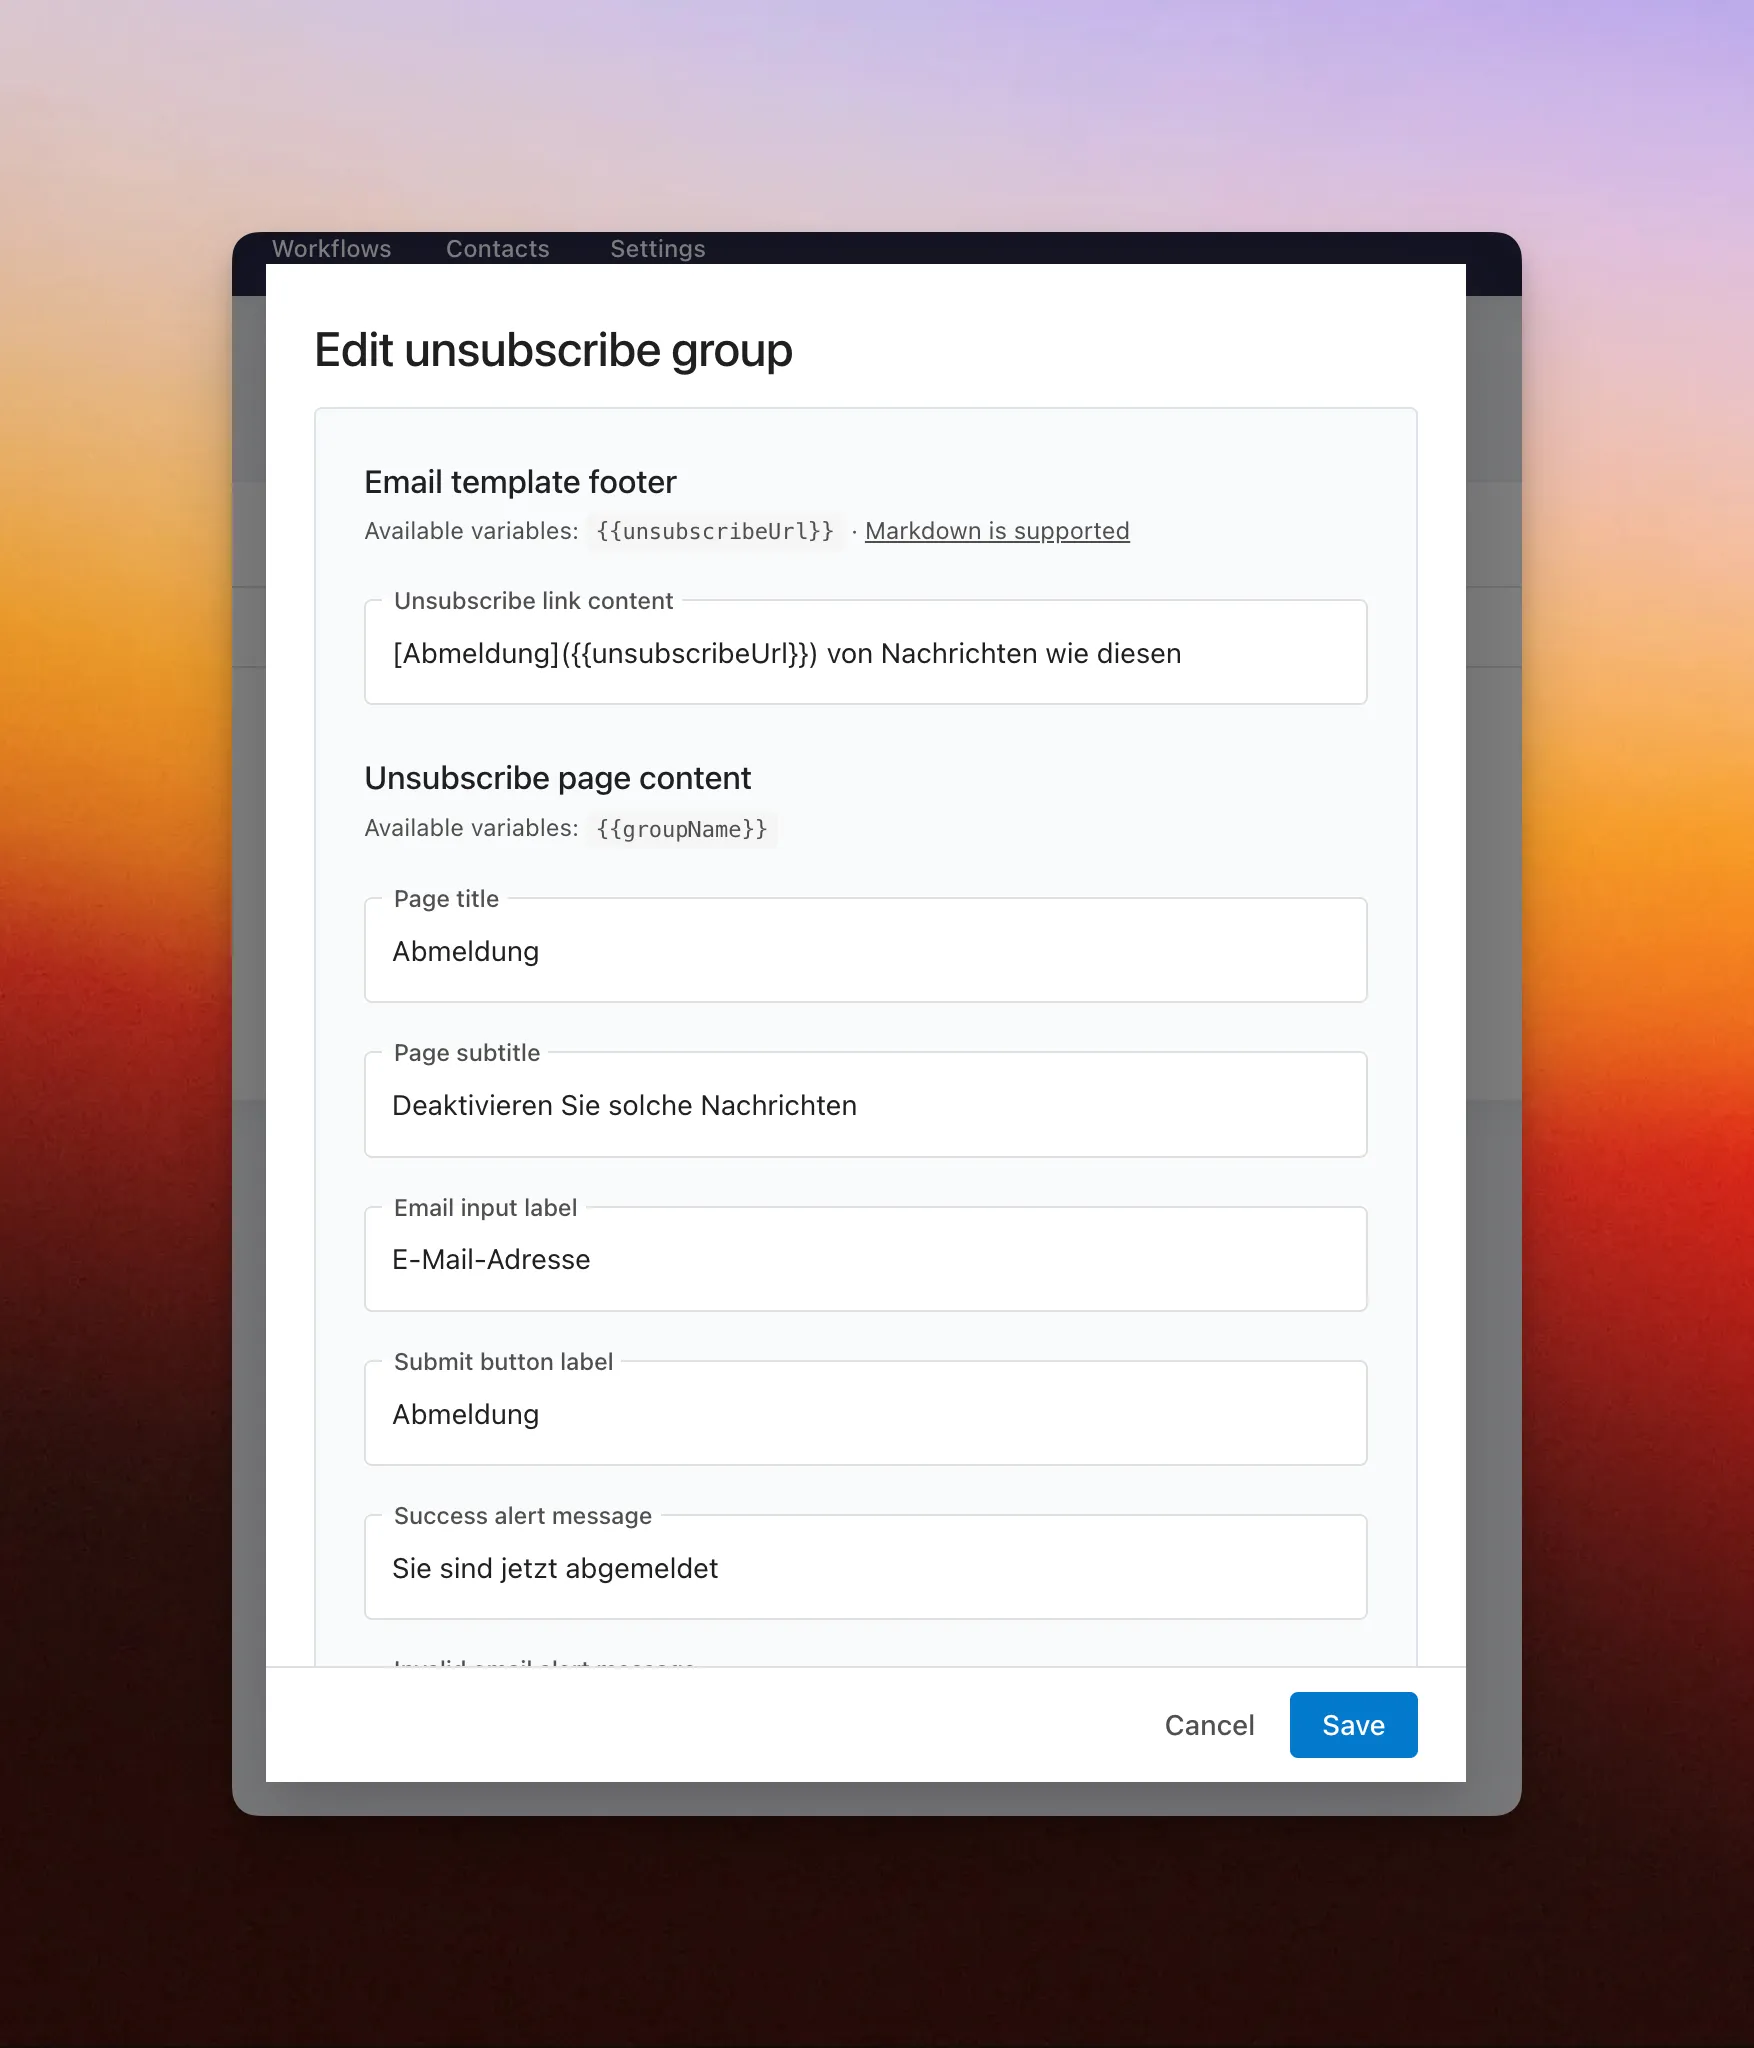
Section titled “Customization”Customize the text on your unsubscribe links and landing page from the Unsubscribe Group settings. You get full control over what users see when they manage their email preferences.
It’s especially handy for localization — set the unsubscribe page in whatever language or tone matches your audience.
Limitations
Section titled “Limitations”- Unsubscribe groups are not currently supported when sending without a template.