Consuming webhooks
If you are using third-party services that support sending webhooks for key events, you can create a webhook endpoint URL on Waypoint to listen for those events and trigger associated workflows (and resulting emails).
Common event examples:
- A successful payment on Stripe.
- A new pull request on GitHub.
- A new user account created on Auth0.
- An new order on Shopify.
- A shipping status change on Shippo.
Once a webhook endpoint is configured, Waypoint will listen for the events you’ve configured on the external service. When an event comes through, it triggers your workflow - automatically processing the webhook data and sending the associated dynamic email.
Triggering a workflow from a webhook
To trigger a workflow from a webhook, set the trigger type on your workflow to HTTP POST. This will provide you with an endpoint URL that will listen to webhook events from a third party service.
Example: Stripe webhook event
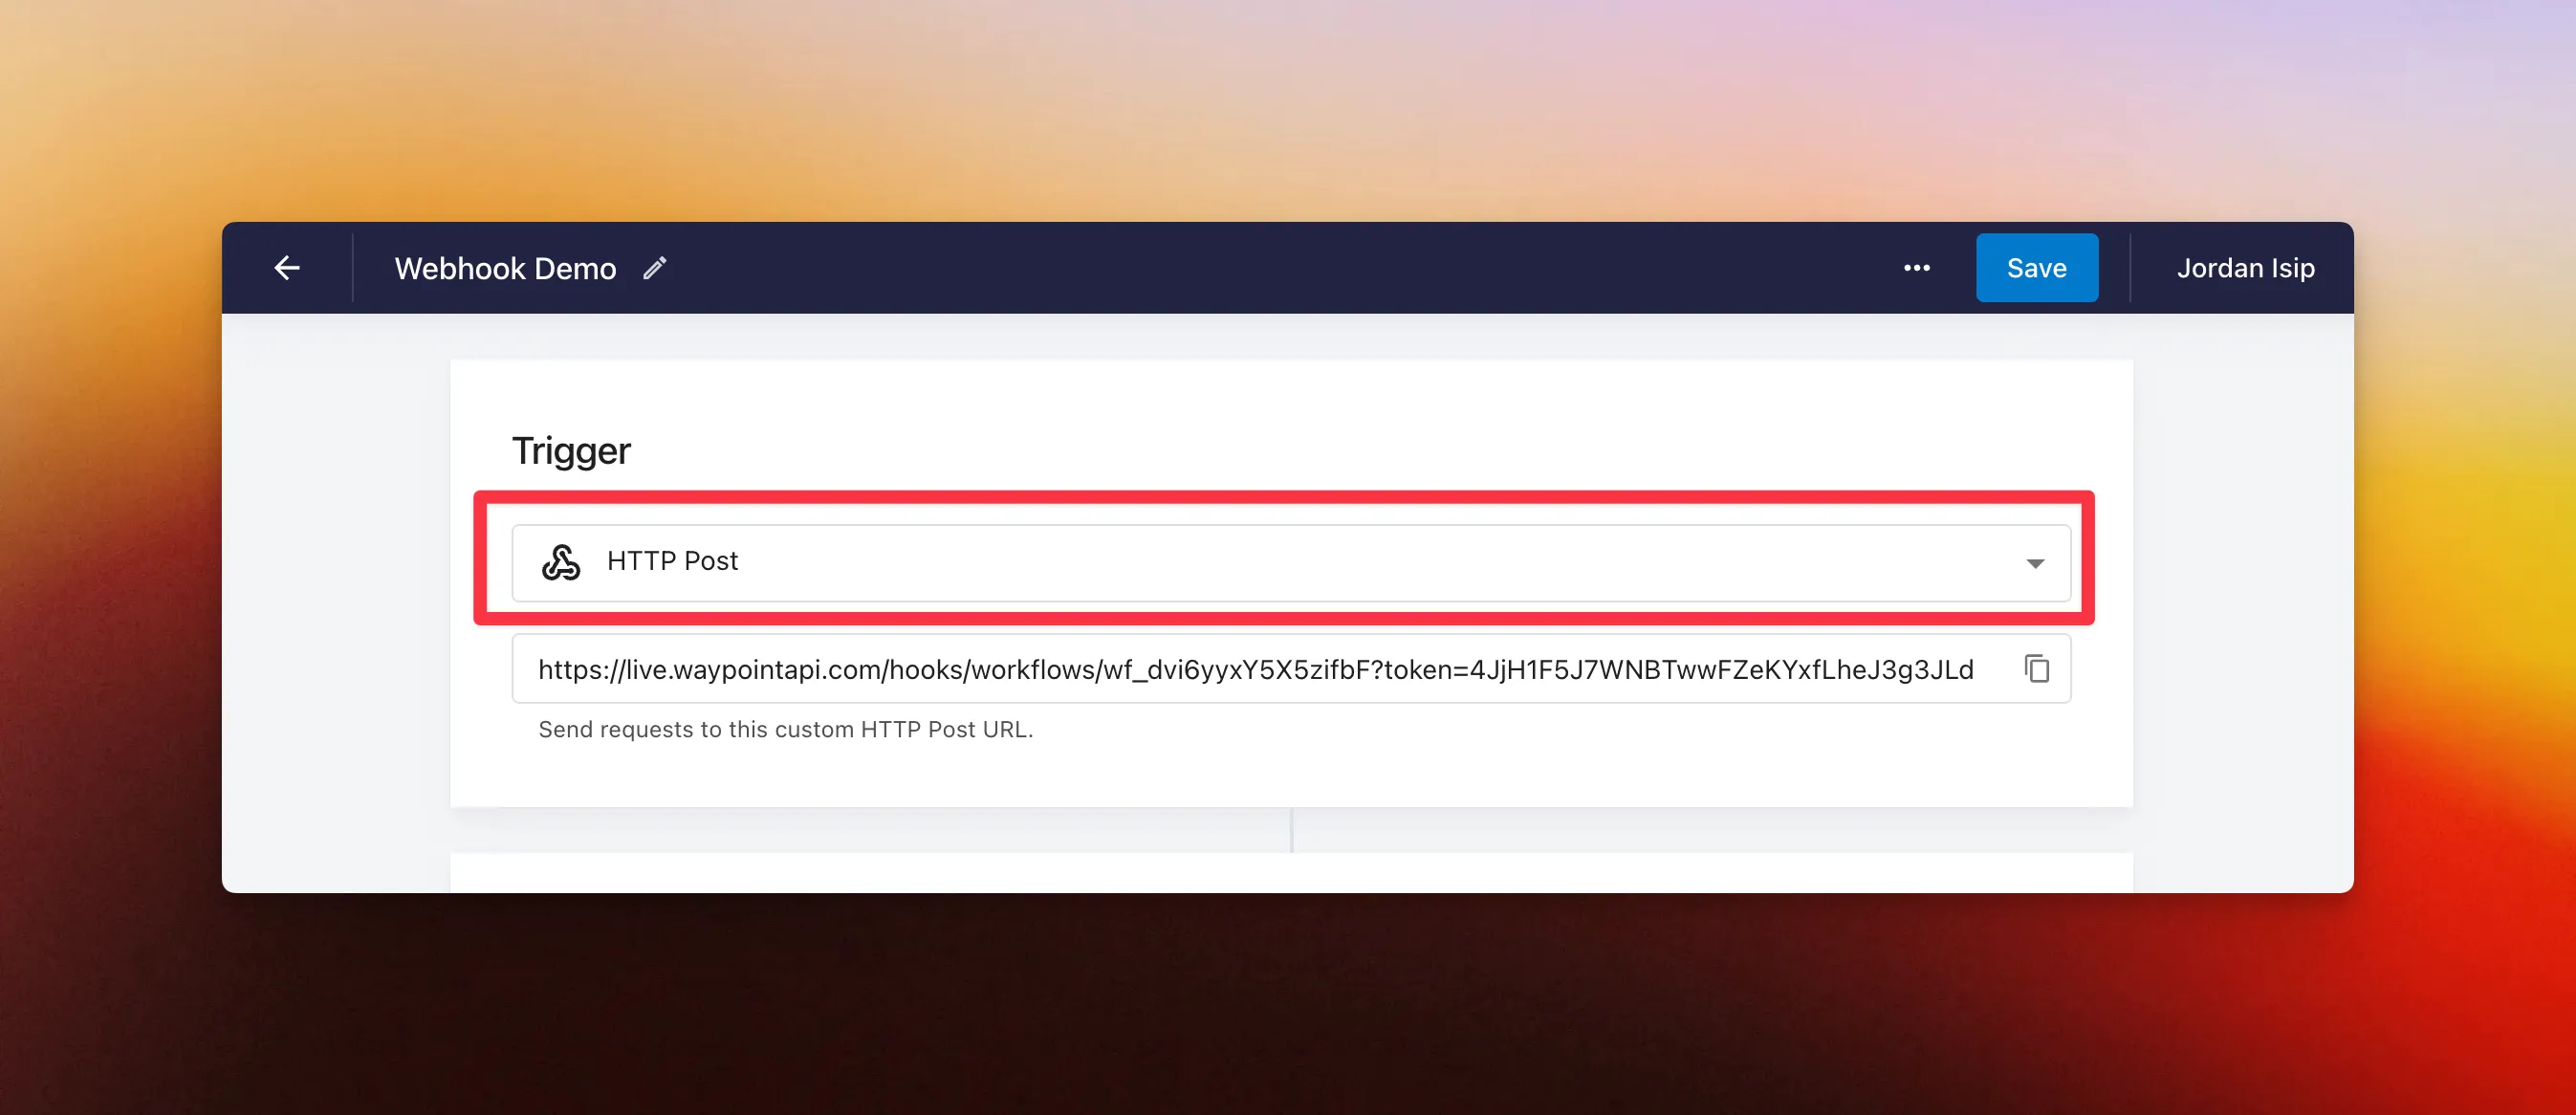
Step 1: Setup workflow trigger
To get started, create a new workflow and set the trigger type to HTTP POST.
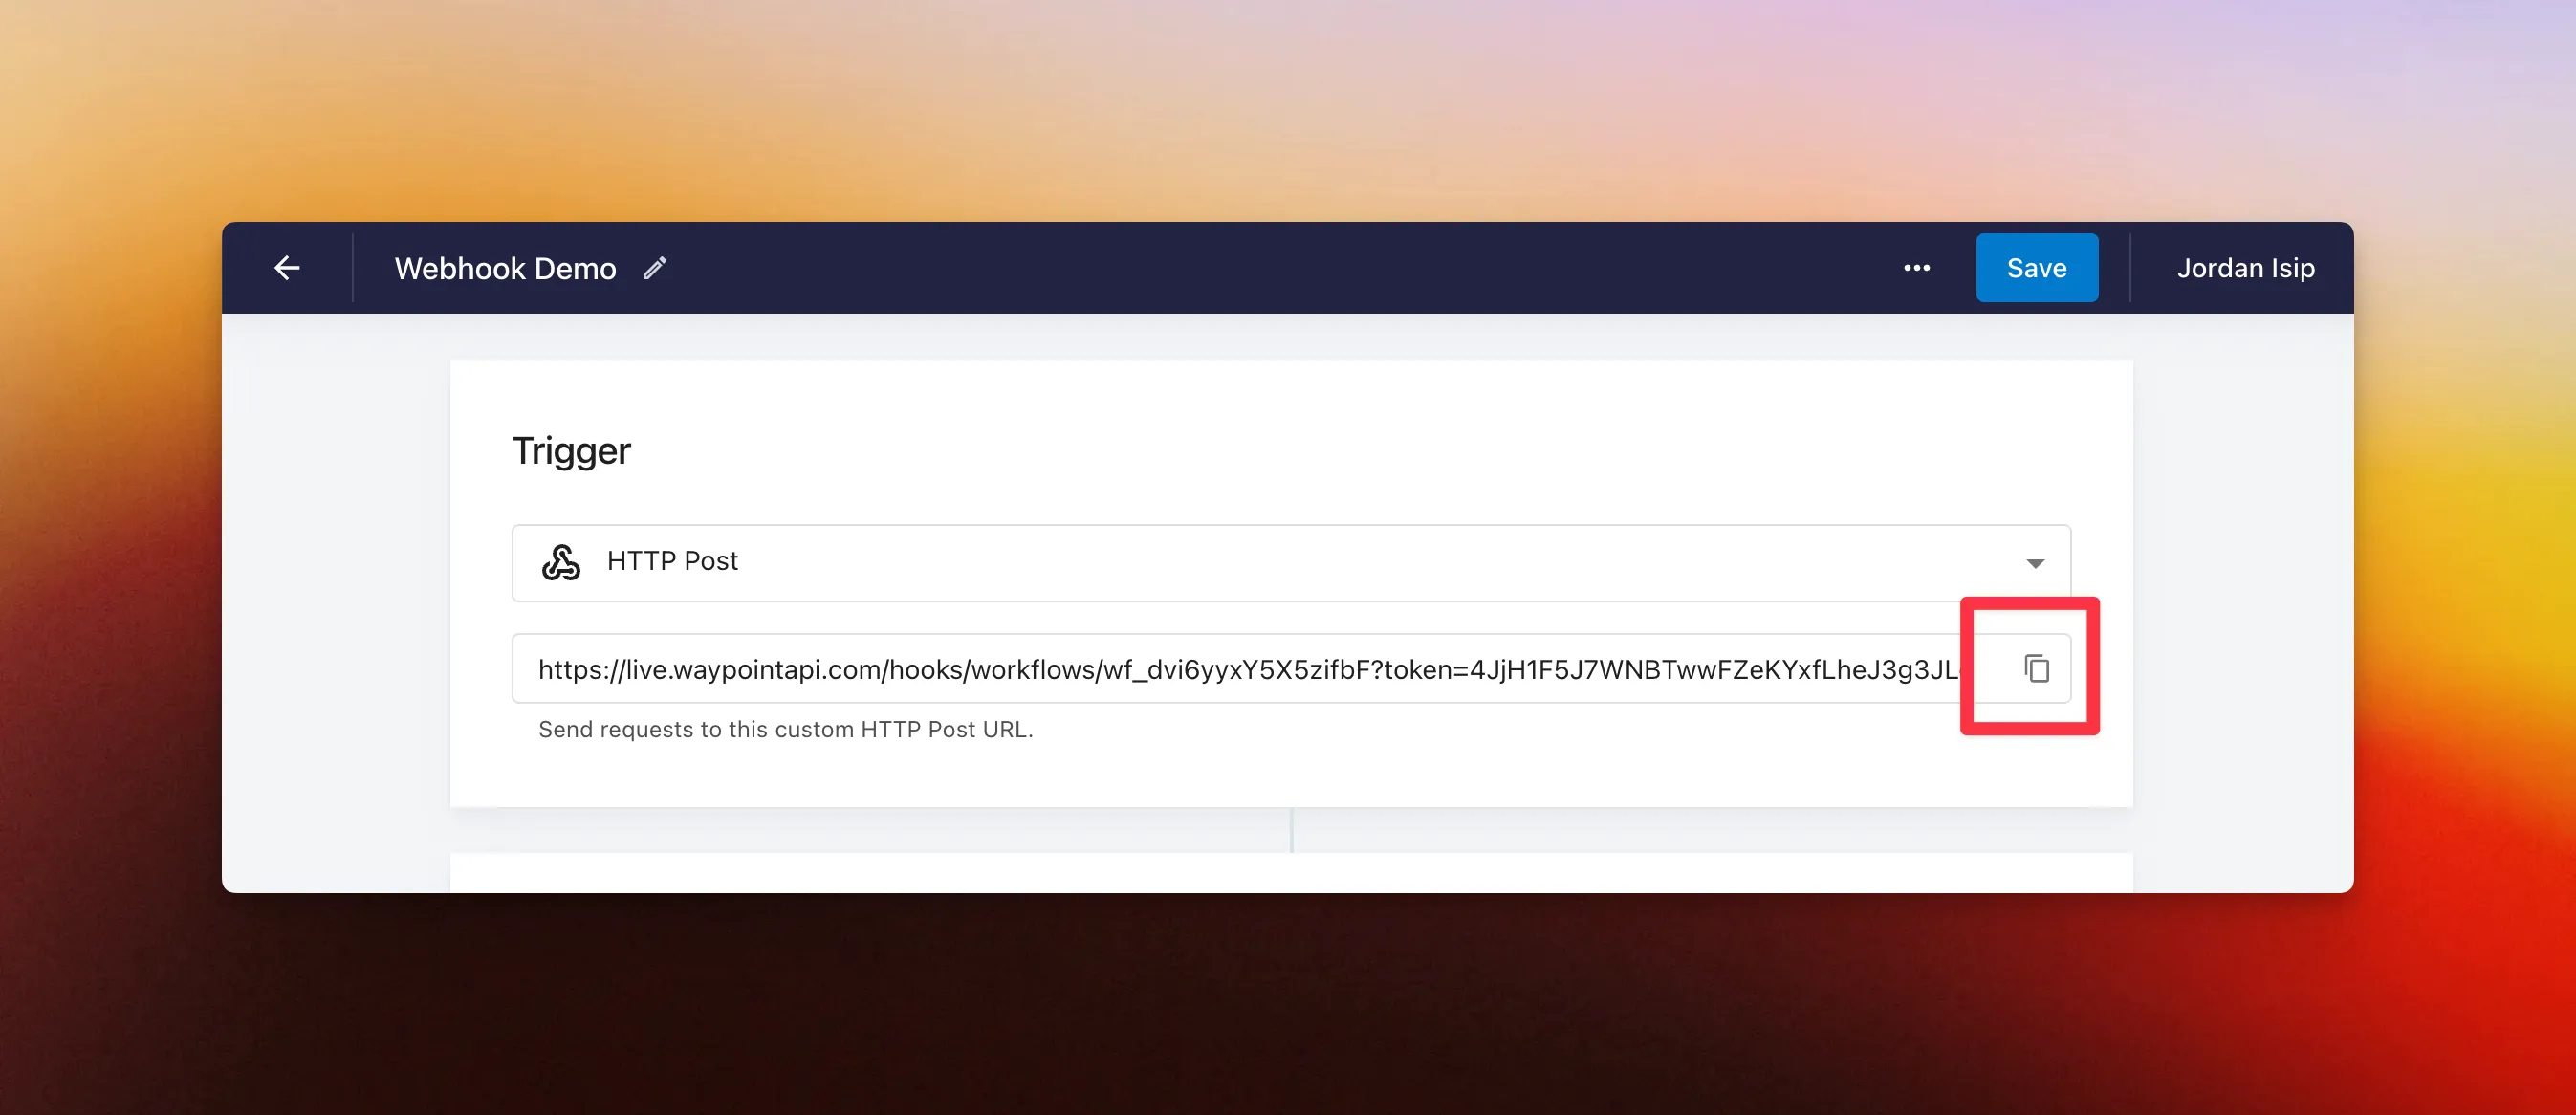
Step 2: Copy webhook endpoint URL
Next, copy this workflow’s webhook endpoint URL to your clipboard.
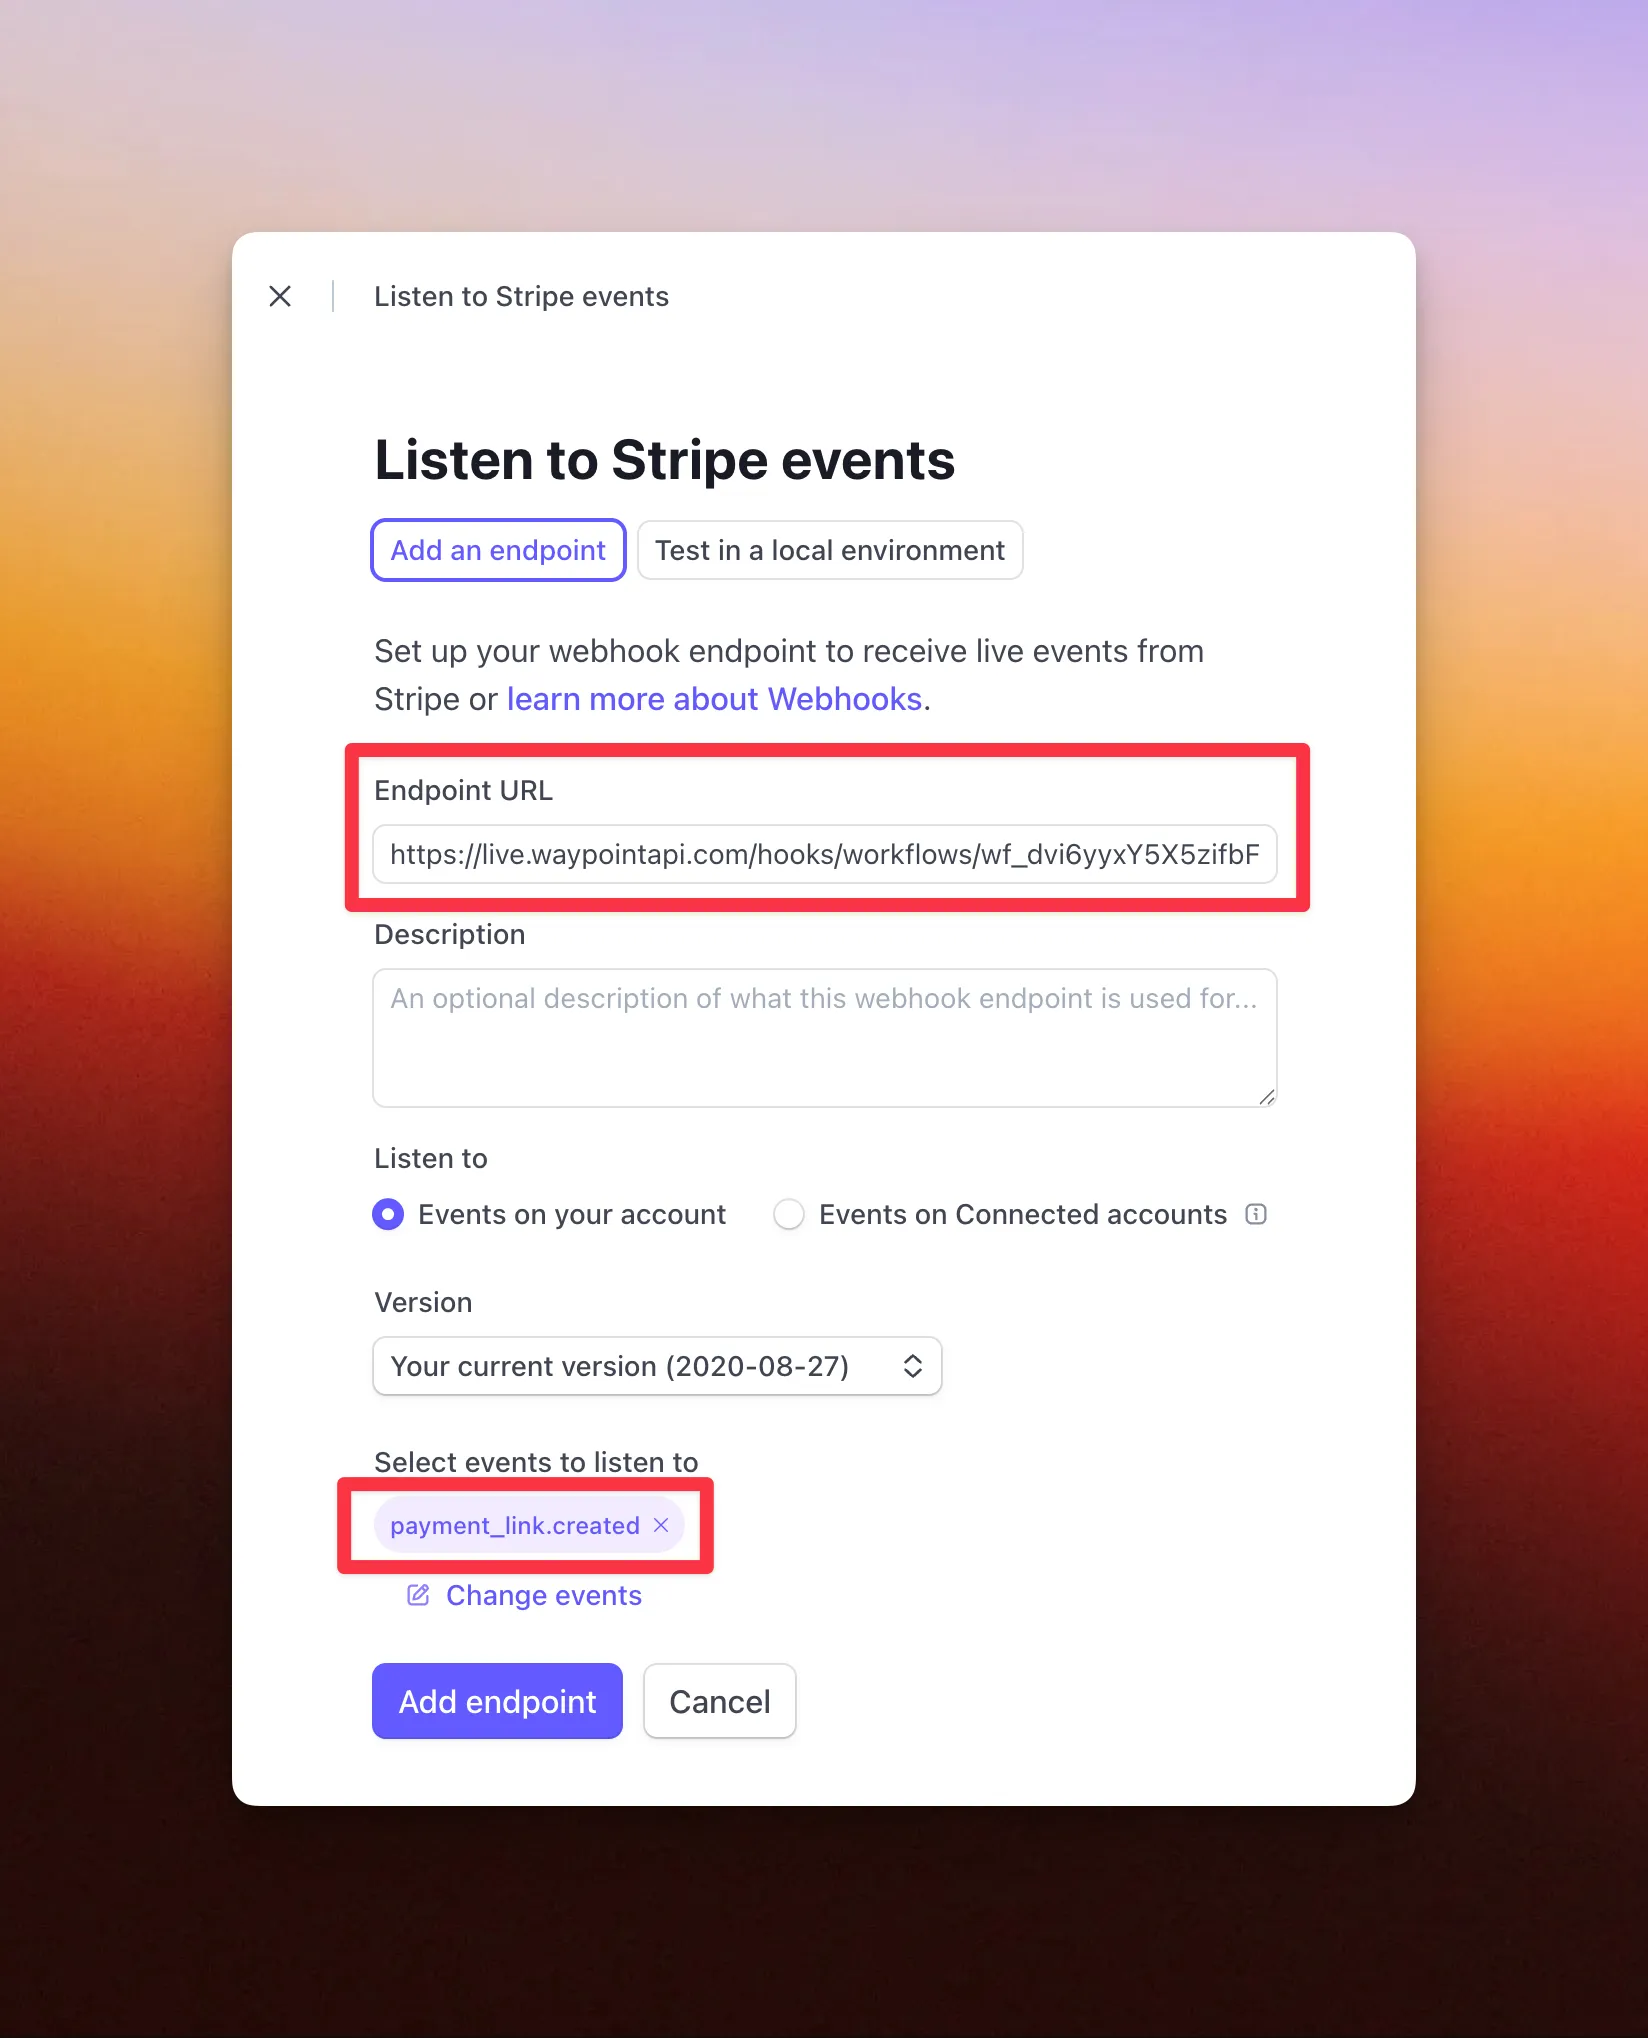
Step 3: Create a webhook on Stripe
Next, head to the Stripe Dashboard and navigate to Developers → Webhooks to create a new webhook on Stripe.
- Paste your workflow endpoint URL into the Endpoint URL field.
- Under ‘Select events to listen to’, select the event type(s) you want to trigger your workflow. For this example, we’ll choose
payment_link.createdto send a webhook every time a new Payment Link is created. - Click ‘Add endpoint’ to save your webhook configuration.
Step 4: Test the webhook connection
Now that the endpoint is configured on Stripe, you can test it to make sure the data is flowing correctly.
- Since we set up the event to trigger on new Payment Links, start by creating a Payment Link on Stripe.
- Once the link is created, Stripe will automatically send a webhook event to your workflow endpoint URL behind-the-scenes.
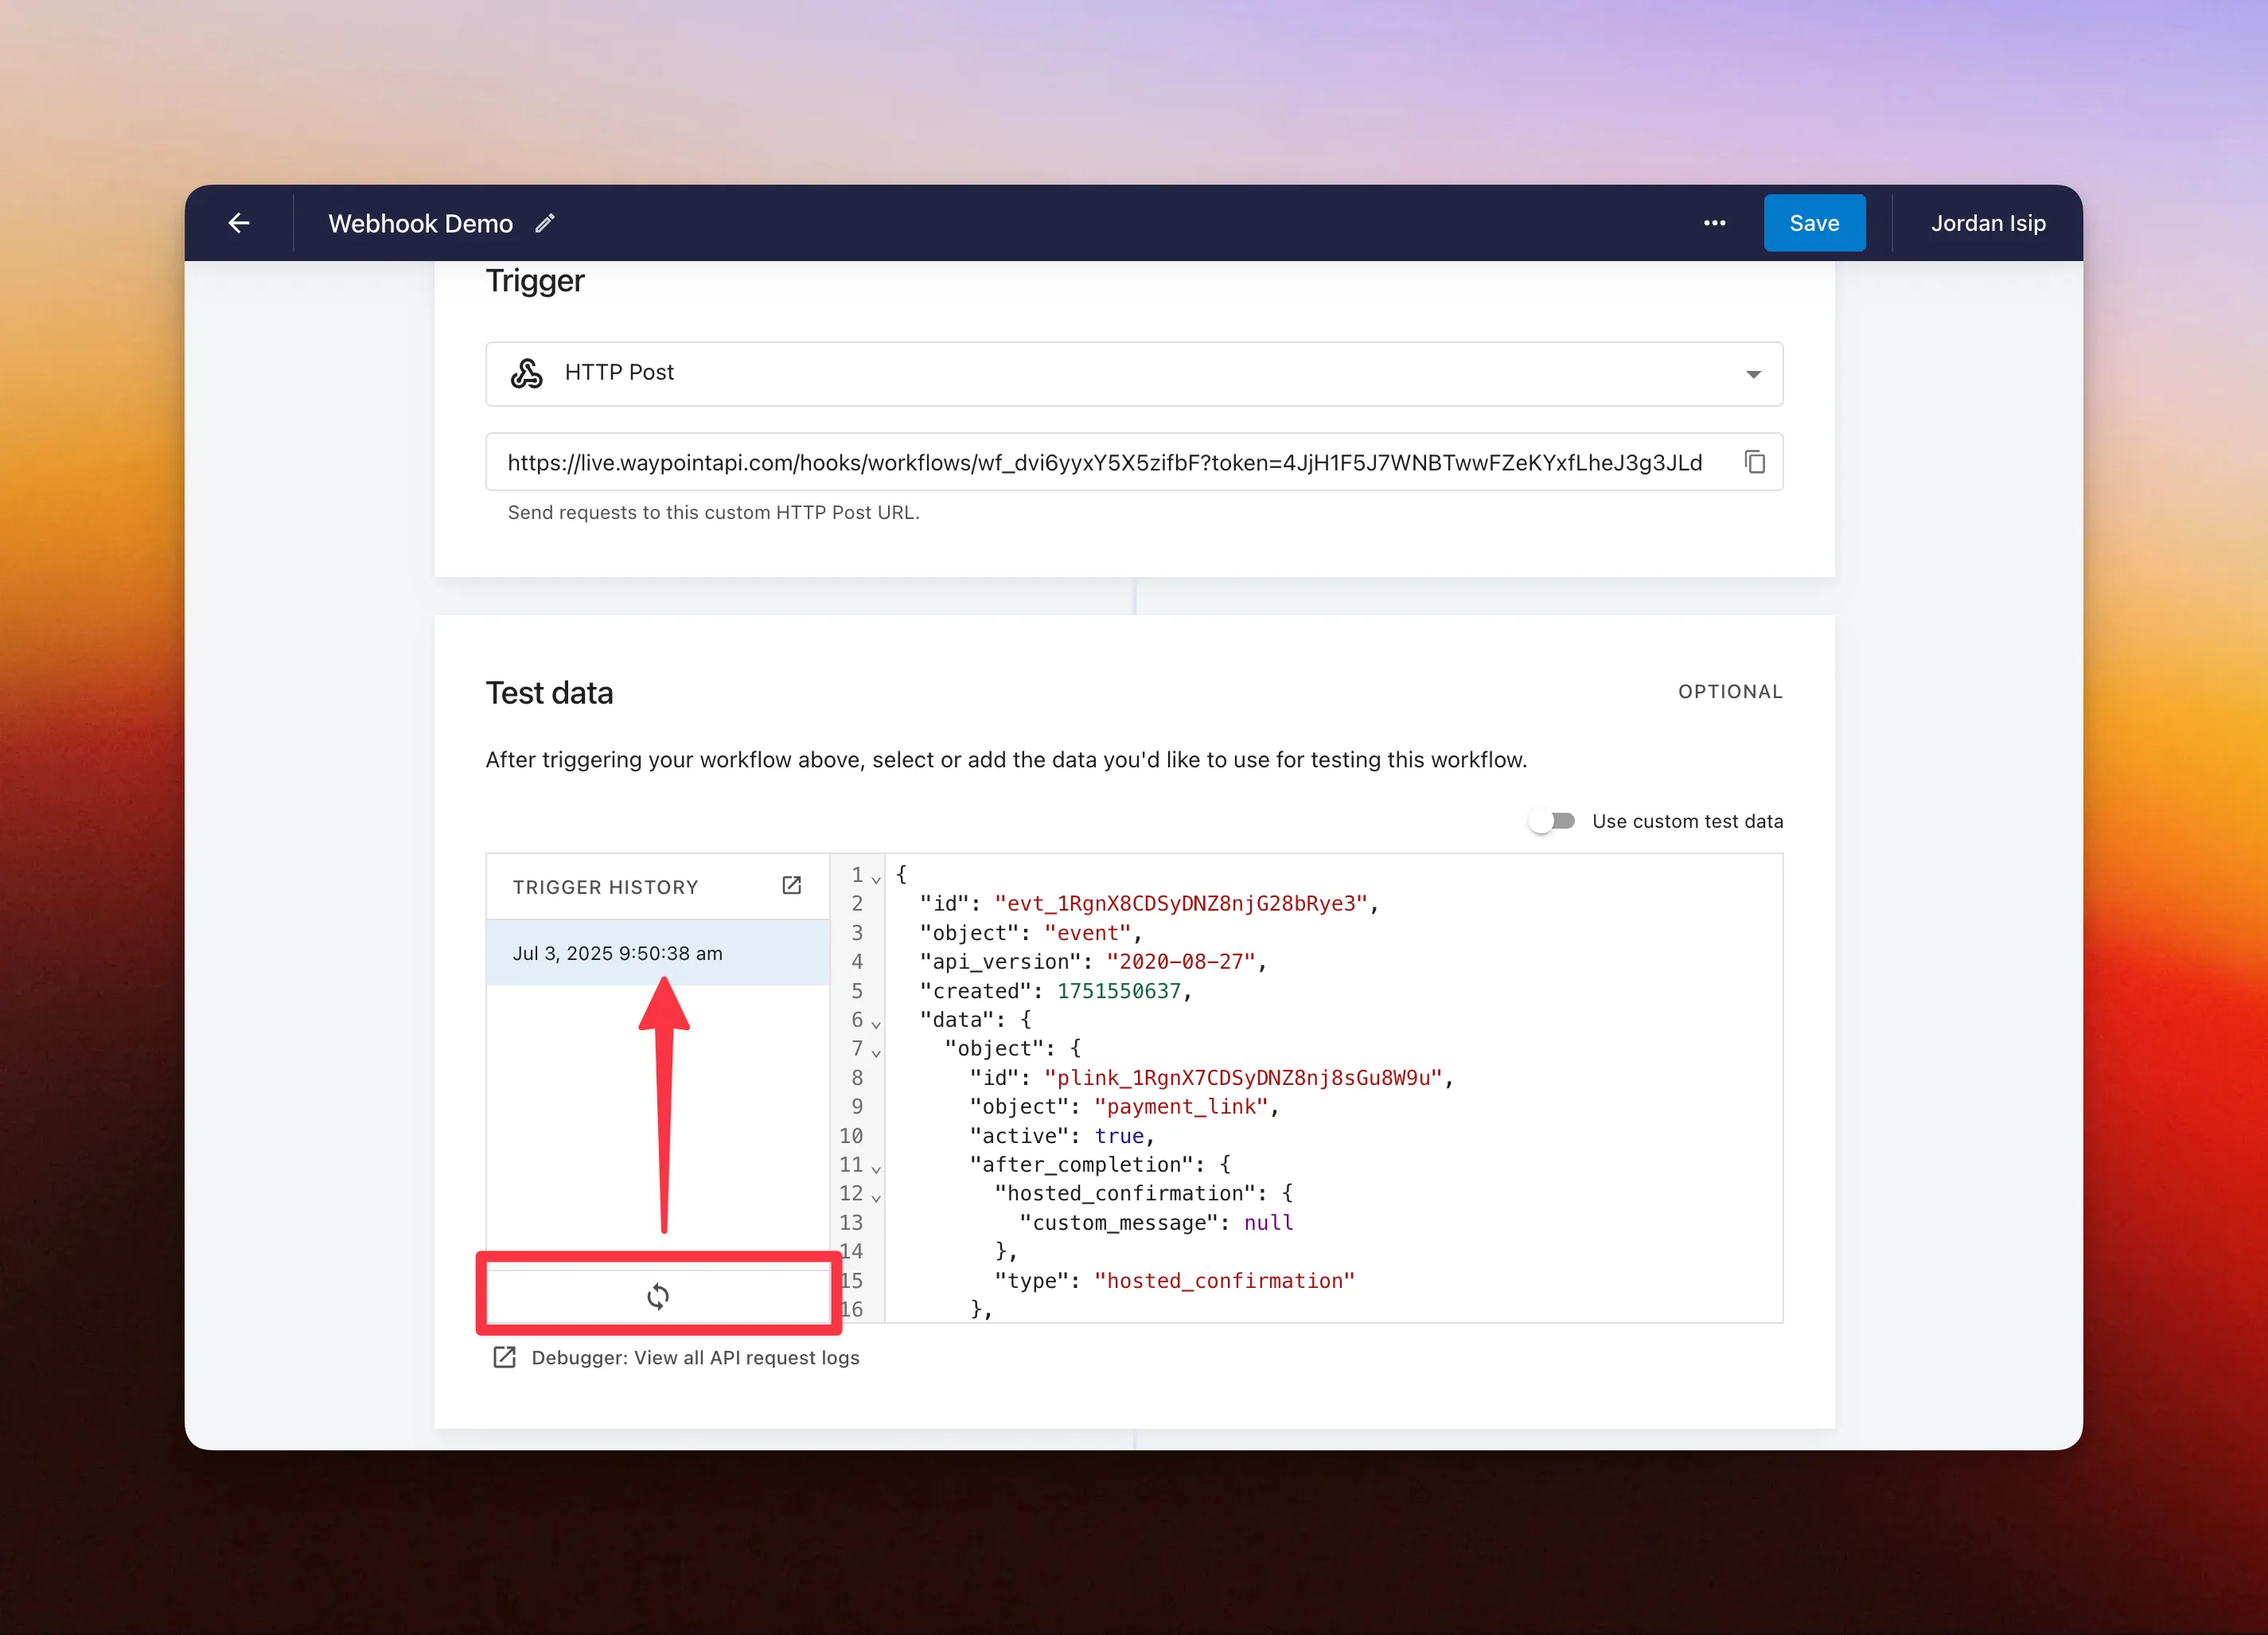
- In your Waypoint workflow, scroll down to the ‘Test data’ section and click the Refresh icon. You should see the incoming webhook event and its associated payload appear, as shown below:
Step 5: Configure email template
Next, reference the test data to configure your resulting email template. You can choose an existing template or use a quick template.
For this example, we’ll use a quick template and reference the id from the webhook payload in both the subject line and body content using template variables {{id}}.

Step 6: Test workflow
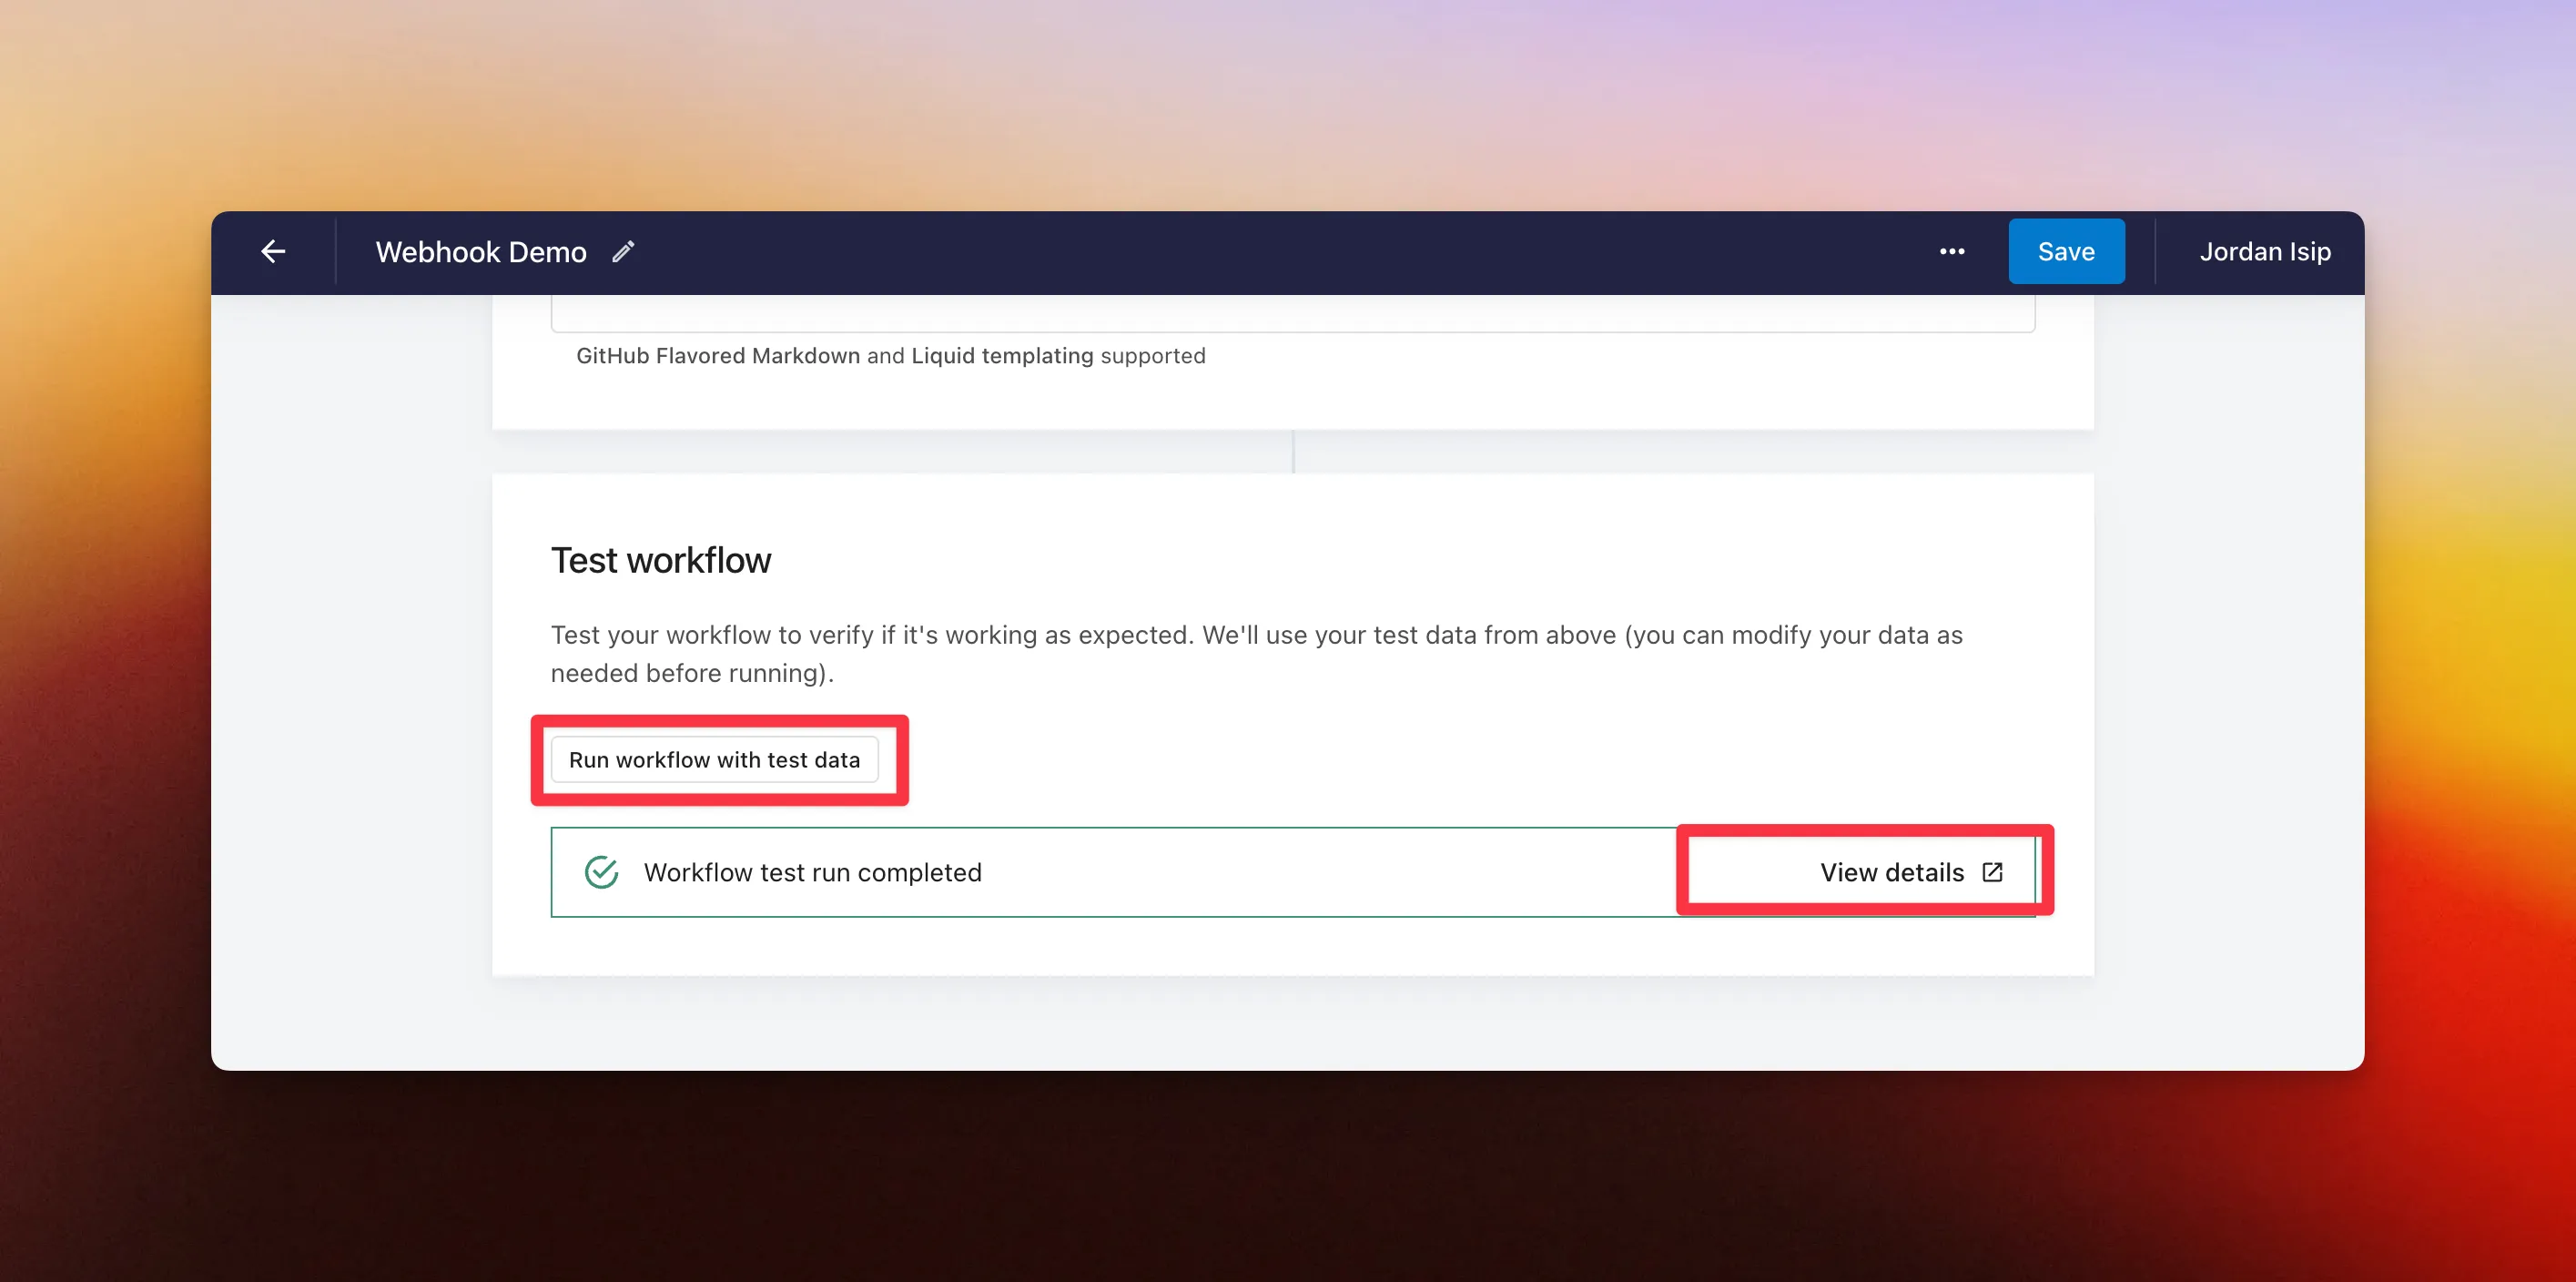
You can now test the workflow end-to-end. This will use the test data configured in Step 4.
- Click ‘Run workflow with test data’.
- After it processes, click ‘View details’.
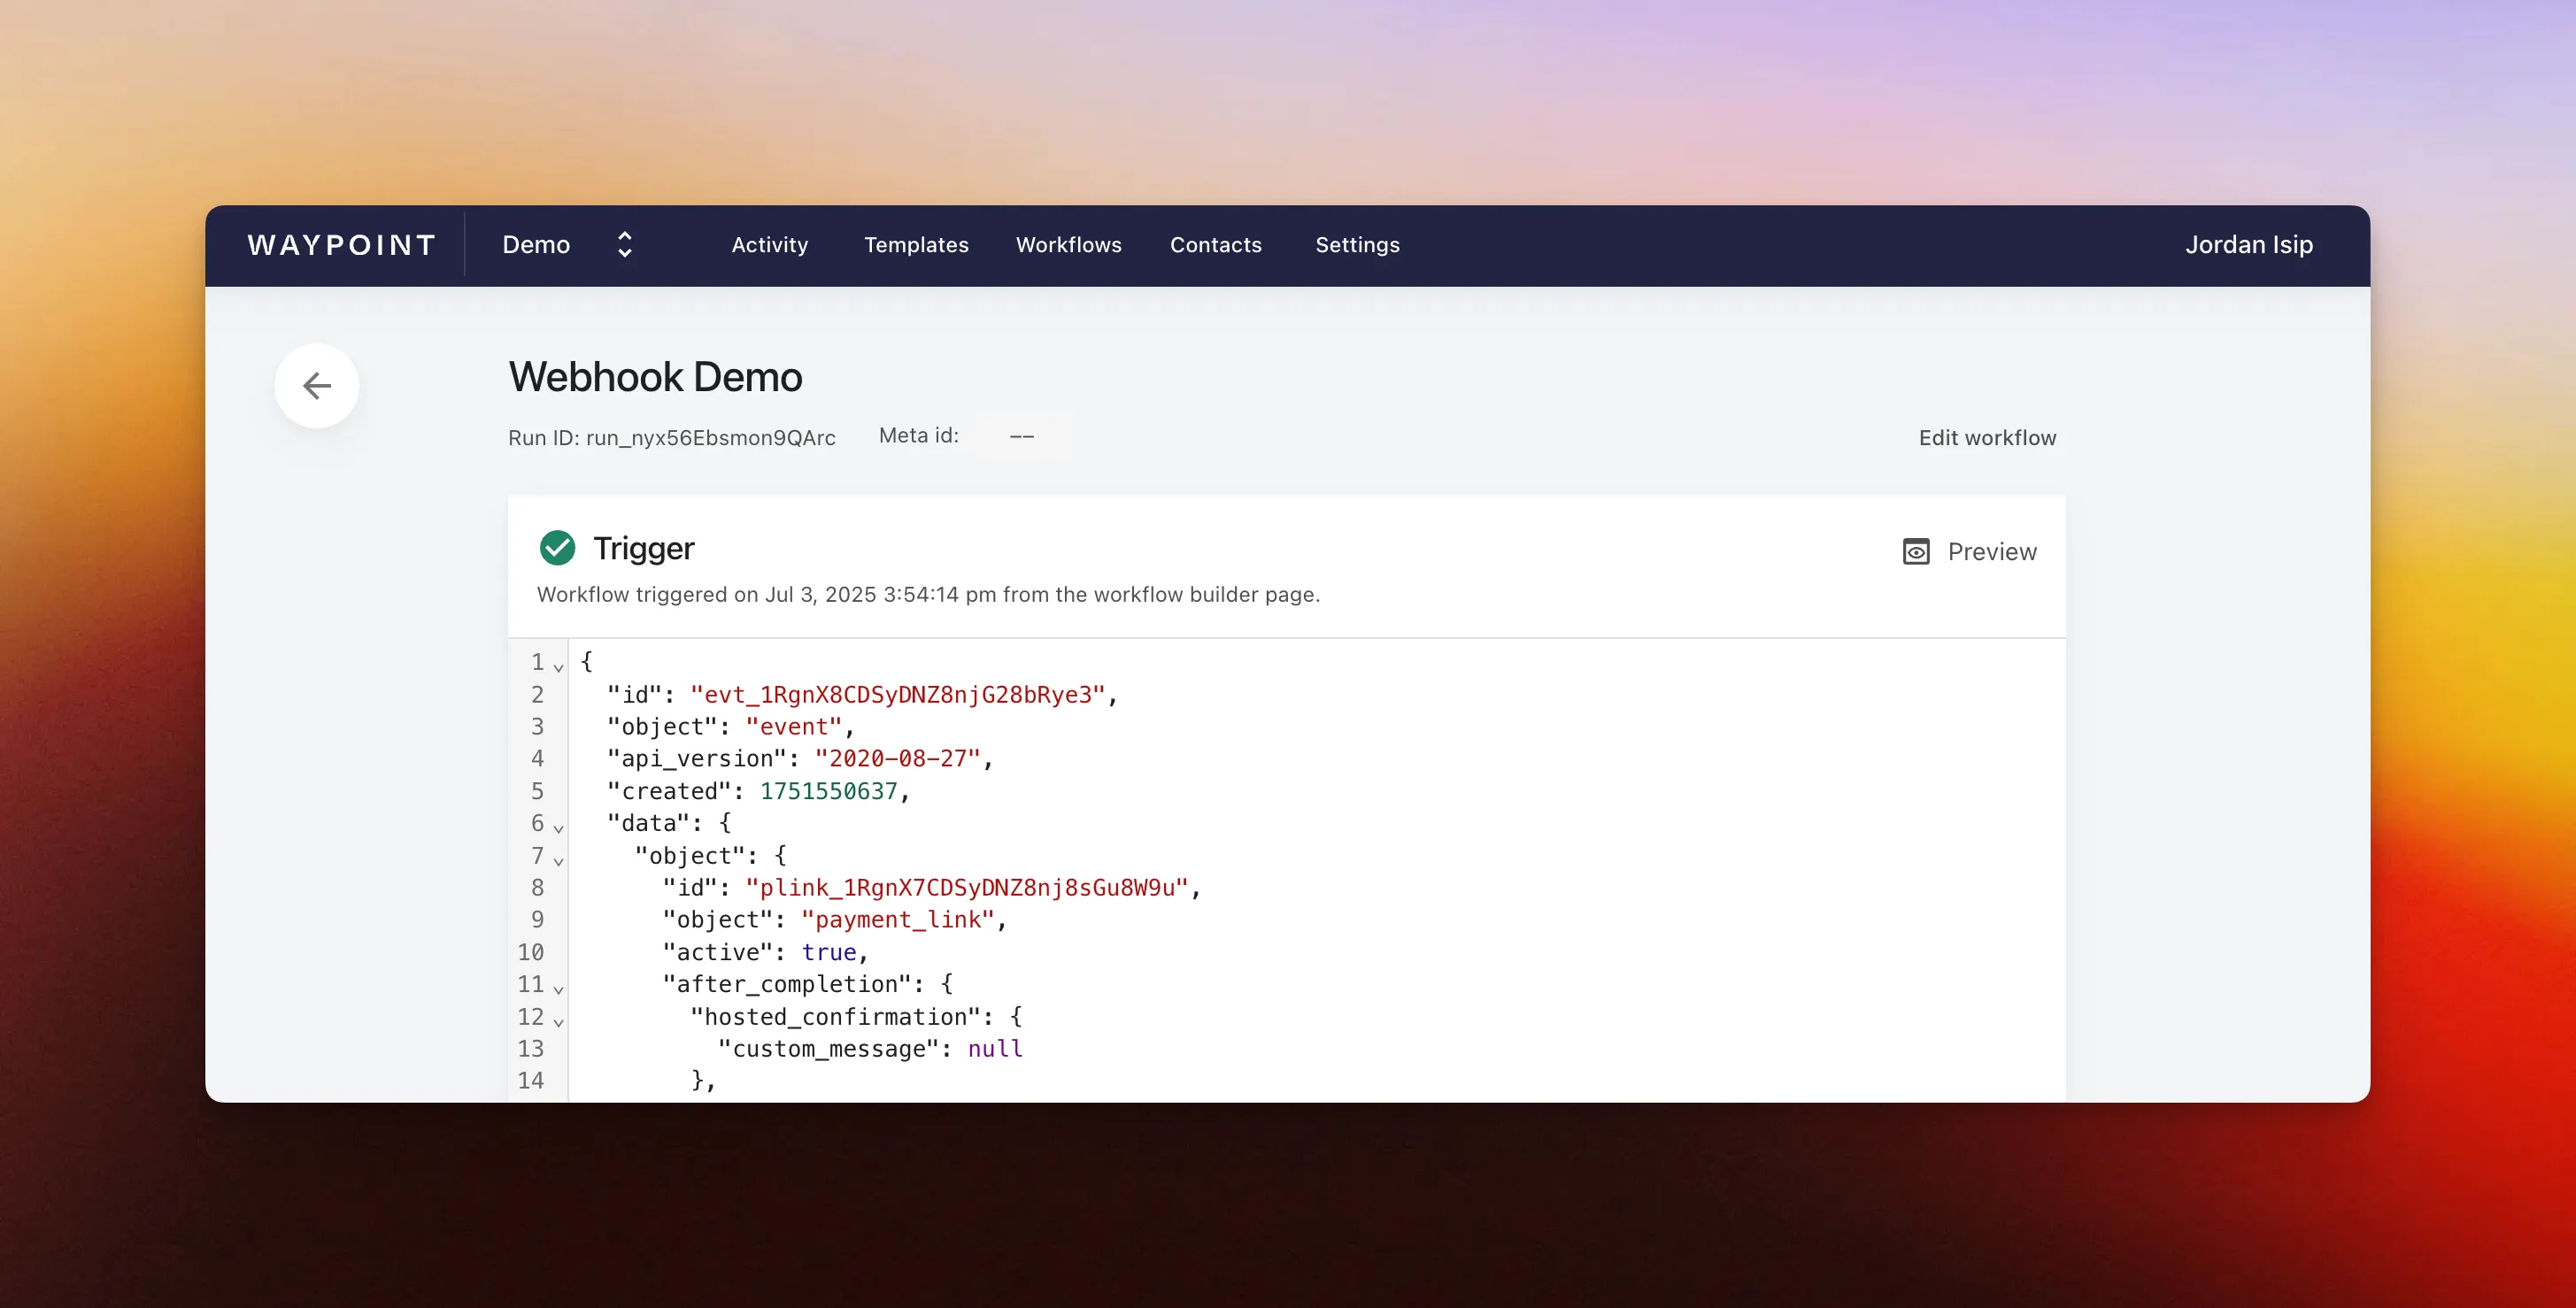
- Review the end-to-end workflow run results.
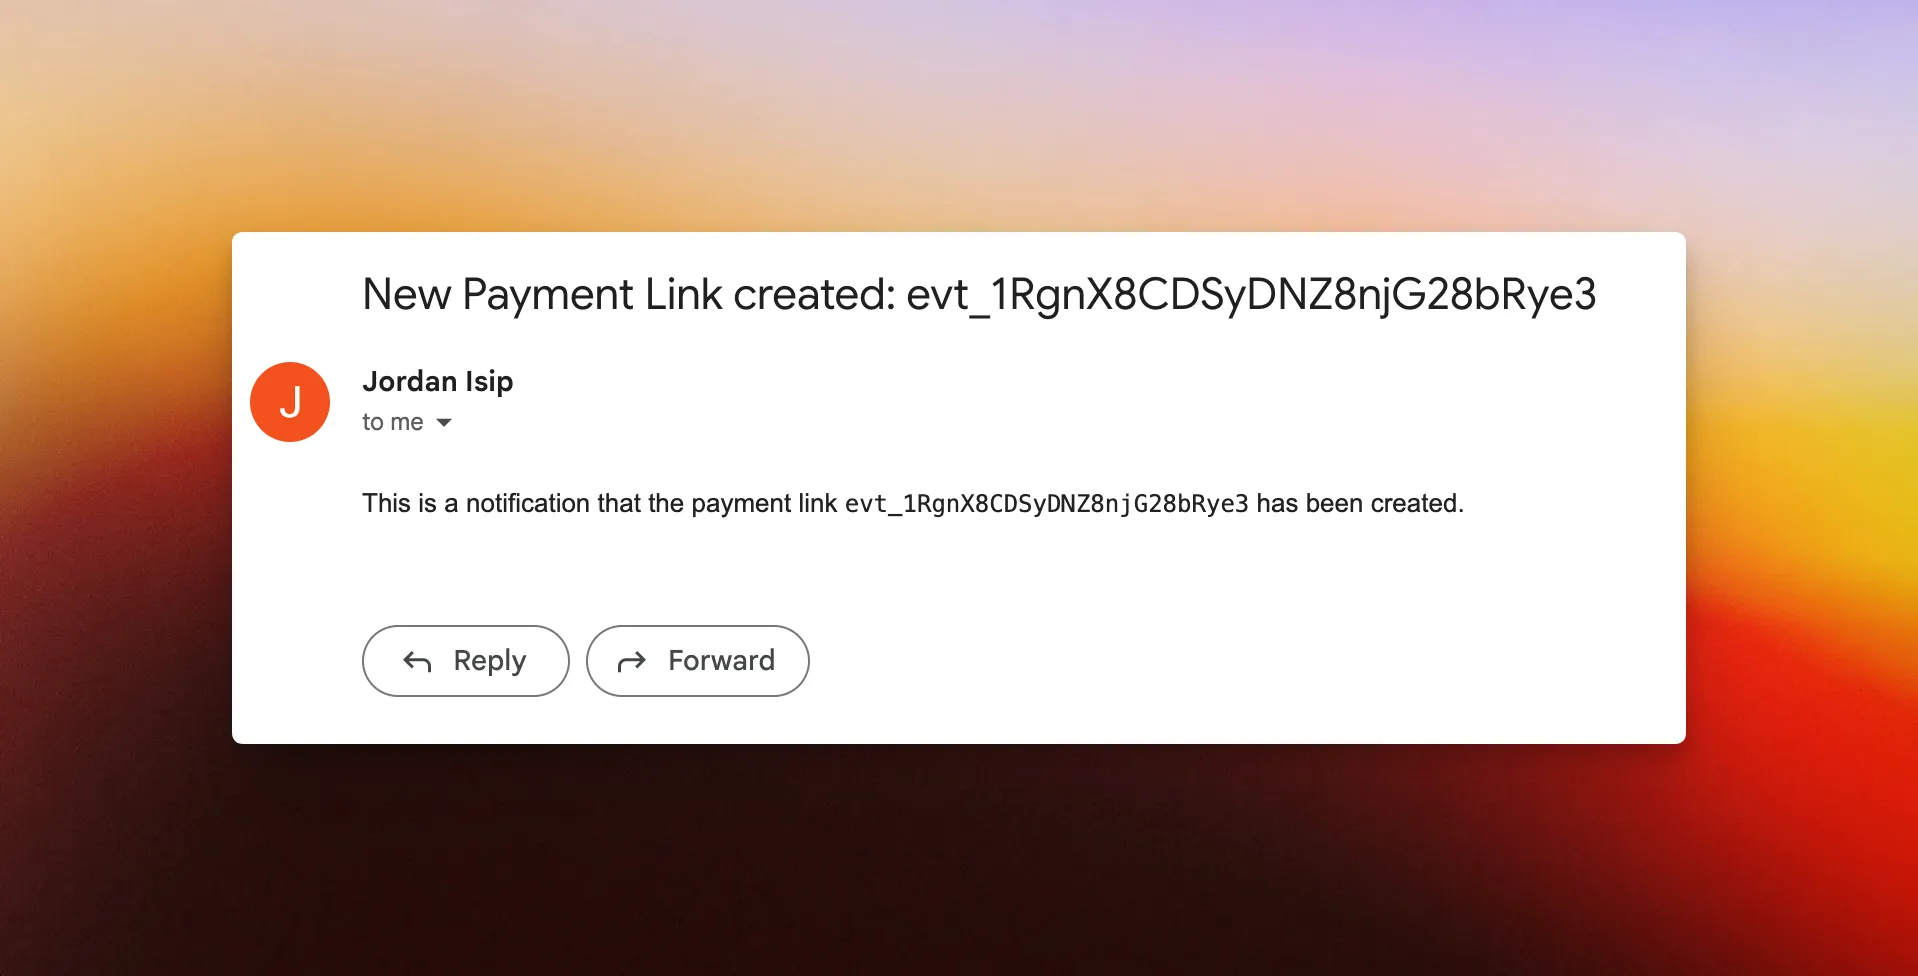
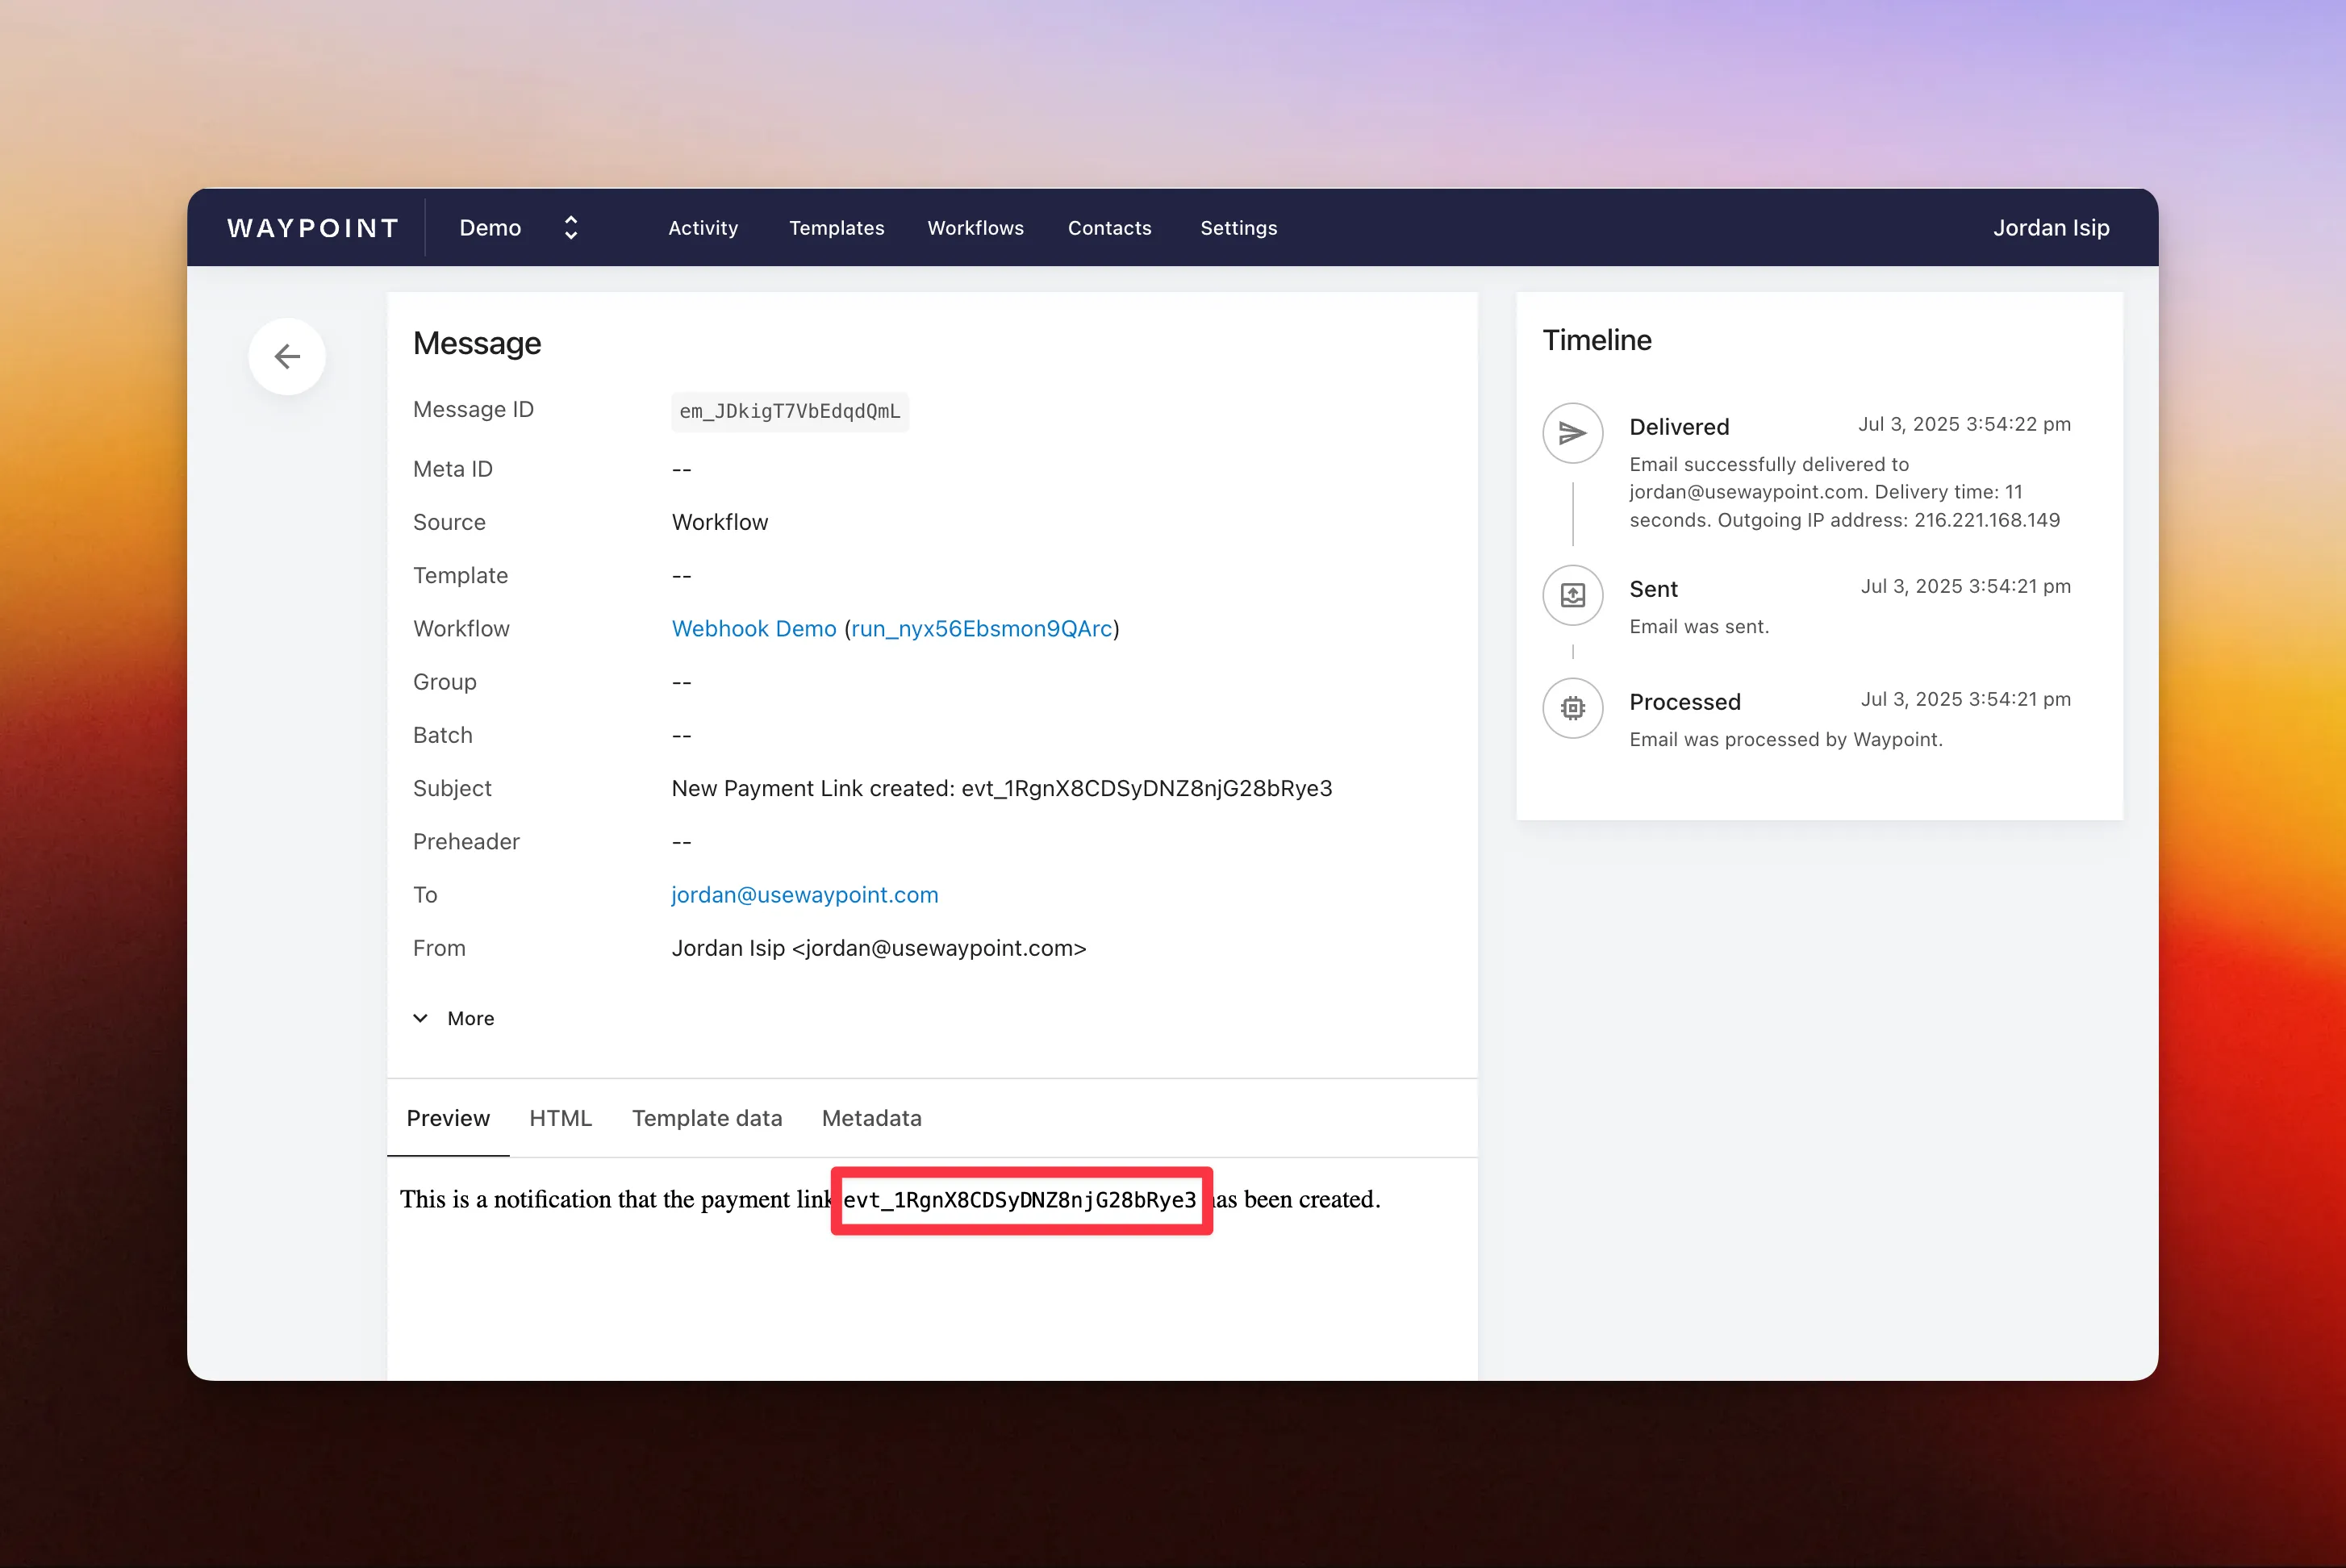
Step 7: View test message
From your workflow run, click the message to view the full log. You’ll see that the {{id}} template variable from Step 5 has been replaced with the actual id from the webhook test data payload.
Step 8: Save and wait for live workflow runs
Finally, go back to your workflow and save it.
Going forward, each time Stripe sends a new event, your workflow will be triggered and a new run will be created. The webhook data will be processed through your template, and the resulting email will be generated and sent automatically.